Here is a guide to one of Star Wars The Old Republic’s Warzones, Odessen Proving Grounds! It is a unique Warzone (8 v 8) in SWTOR that is heavily RNG based and favours more coordinated teams who play objectively, are aware of the map and their surroundings and have good luck.
Please note: this guide was originally published on Xam Xam Says in 2016. Screenshots are from older updates but the map itself hasn’t changed all that much since it was released in April 2016.
Last Updated: 23rd April 2022.
The Basics
Odessen Proving Grounds is basically a ‘King of the Hill’ type map. There are two teams, Team Gold and Team Purple. The first team to get 600 points wins. To earn points, you capture Control Points by standing in them for 4 seconds. They spawn randomly in 5 different parts of the map. In each round, there are a varying number of Control Points available to capture.
Additionally, there are Battle Mods, which aid your team by increasing the points you gain or stopping the other team from gaining points.
The key to understanding and then excelling at this Warzone is to familiarise yourself with the map so you can learn where everything is.
The Map
Below is the map of Odessen Proving Grounds which shows where everything of note is. This Warzone is, for the most part, on one level and does mimic the Alliance Base from KOTFE to some degree.
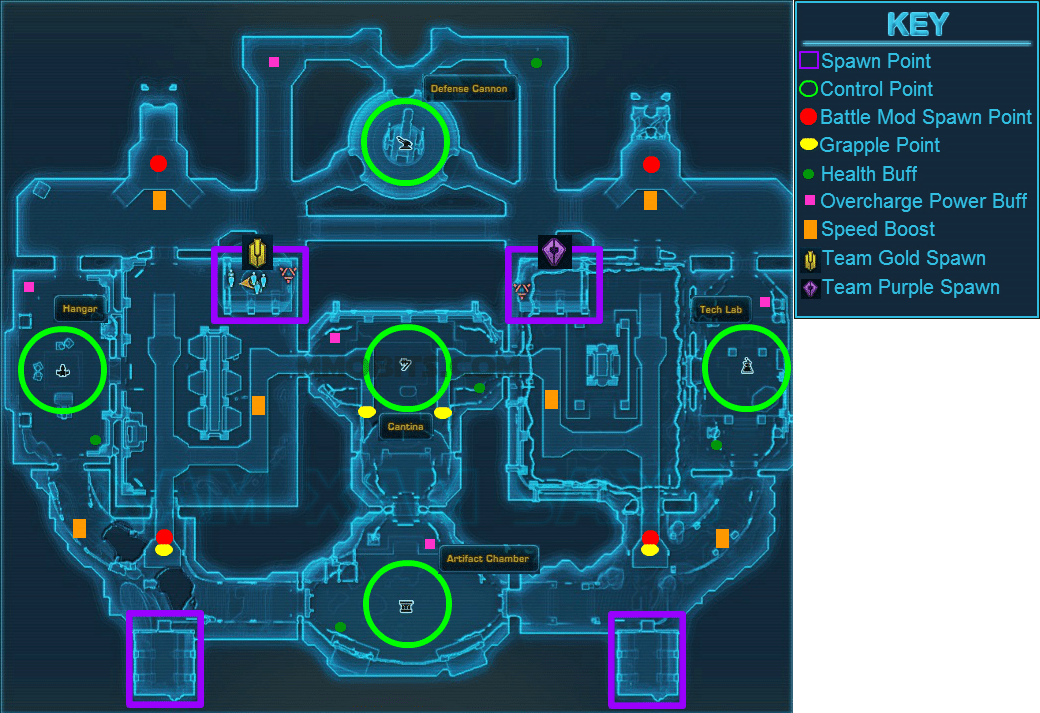
The Control Points align with the cardinal points of a map and are often referred to as such.
- Defense Canon – North
- Cantina – Mid
- Artifact Chamber – South
- Tech lab – East
- Hangar – West
Most of the map is ‘indoors’ and is basically a re-purposed cave (like the Alliance Base in KOTFE/KOTET) and is mostly of level elevation. The Artifact Chamber Control Point, however, is ‘elevated’ above the rest of the map and is accessed by the pathways on either side which slope up. If you head north from the Artifact Chamber, you end up on a stage that ‘overlooks’ the Cantina Control Point. From the stage, you can jump down to the Cantina Control Point or get to suspended walkways via Grappling Hooks.
The suspended walkways run above most of the map between the Hangar Control Point, through the Cantina Control Point (there is a gap in the walkways above the Cantina), and the Tech Lab Control Point. There are Speed Boosts and Battle Mods located on the walkways (as indicated on the map above). You can get to the suspended walkways by either using Grapple Hooks (indicated on the map) or via two ramps which are located near both of the northern Spawn Points.

There are two large rooms. One between the Hangar and Cantina Control Points and one between the Cantina and Tech Lab Control Points. Both rooms look different and serve as an entry point to the walkway system and a ‘buffer’ between the Control Points. The two main Spawn Points are also located in the northern part of these rooms. At the start of the Warzone, Team Gold always spawns from the north-west spawn point (which is between the Hangar and Cantina) and Team Purple Spawns from the northeast spawn point (between the Cantina and the Tech Lab).
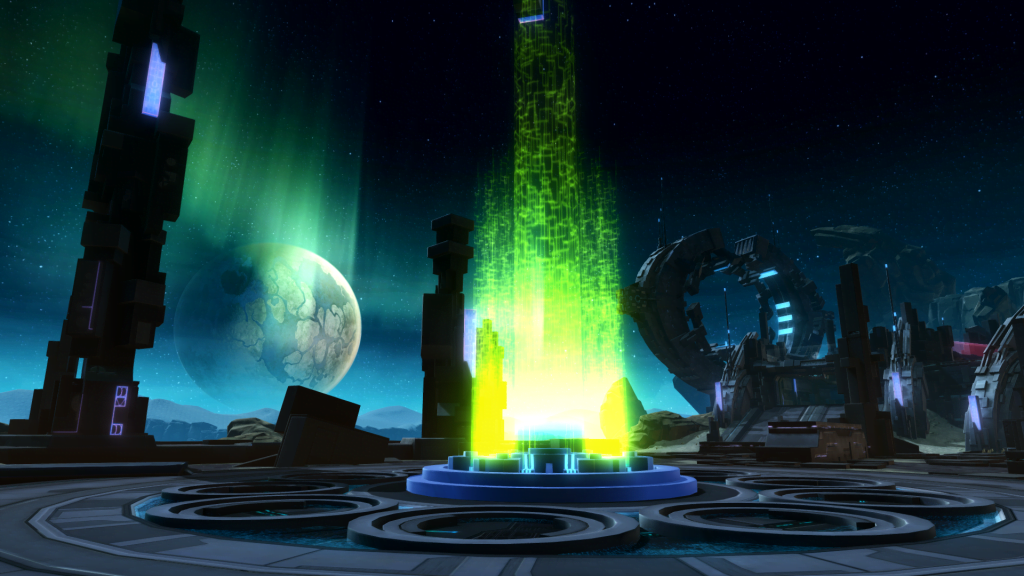
There is an outside area where the Defense Canon Control Point is which basically consists of walkways suspended on the edge of a canyon (like how the Alliance Base is situated in the KOTFE/KOTET story). There are also elevated walkway platforms that have Battle Mods on them (as indicated on the map).
Grapple Hooks
There are four Grapple Hooks that can be used to get to the suspended walkways in certain locations. Two of the Grapple Hooks are located opposite the two southern Spawn Points. You can grapple directly from the Spawn Point to the suspended walkways or grapple to the walkways from below (as seen in the left image below). Note that there are also Battle Mod Spawn Points beneath the Grapple Hooks on the walkways.
There are also two Grapple Points located on either side of the stage which overlook the Cantina (Mid) Control Point (you can access the stage by going north from the Artifact Chamber (South) Control Point). These Grapple Hooks allow you to get to the suspended walkways which are above the Cantina Control Point (as seen in the right image below).


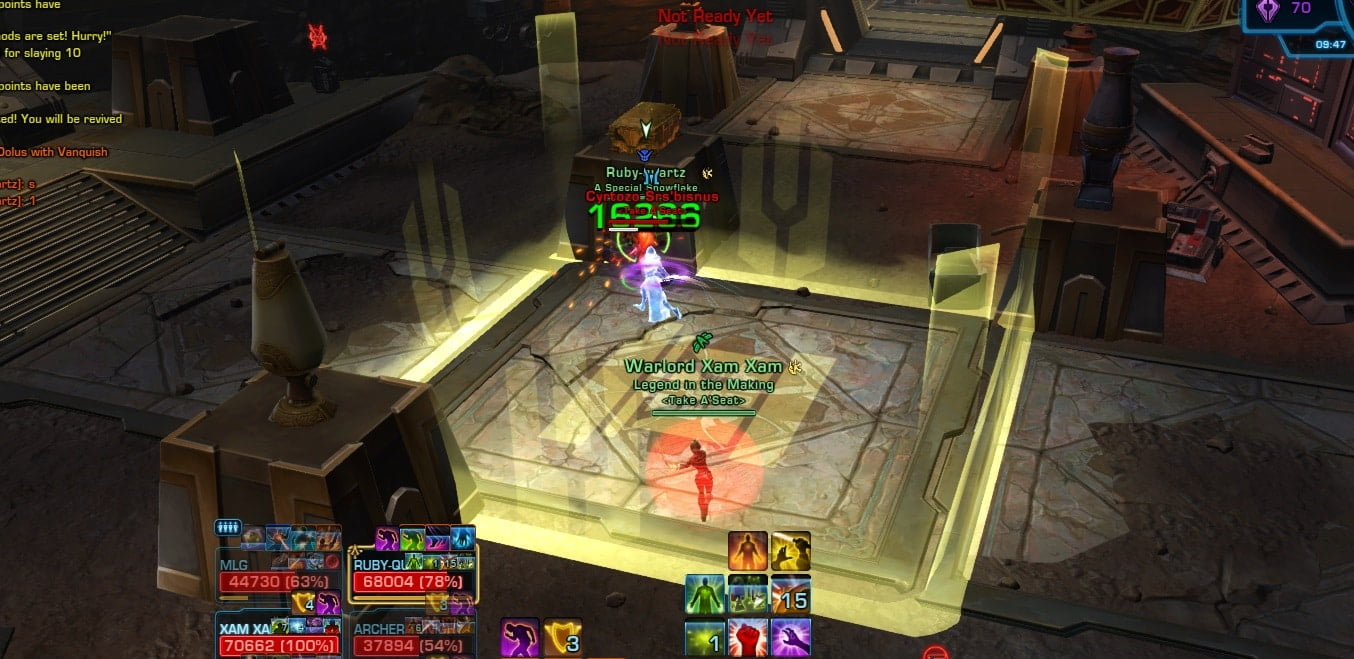
Scoreboard
This is the Scoreboard for the map. It not only shows how many points your team and the enemy team have but also shows which Control Points are active or captured by which team. It also ‘visually’ indicates how much time the Control Points have until they’re despawned.


Control Points and Scoring
The main aim of this Warzone is to capture and hold the Control Points. There are a total of 7 rounds which last 90 seconds each. The first round always starts with 2 Control Points activating but, only the 3 middle Control Points (Defense Canon, Cantina and Artifact Chamber) have a chance to become active. Each team spawns from the two northern spawn points (as outlined on the map above). When each round is concluded the Control Points will despawn and reset. The next round starts after a 4-second interval with new Control Points activating at random. The number of active control points increases, per round, as the match goes on.
- Rounds 1, 2, 3: Two Control Points are active.
- Rounds 4, 5, 6, 7: Three Control Points are active.
All you have to do to capture a Control Point is to stand in it for 4 seconds without anyone from the other team standing in it. The number of players standing inside a Capture Point is irrelevant and does not affect how fast your team earns points. For each second a team holds a Control Point, they get 1 point.
There must always be someone standing in a Control Point to hold it for their team. If everyone leaves the Control Point after capturing it, the team loses control of it (after a 4 second grace period) and it goes back to being an uncontested Control Point.
A captured Control Point lights up in the colour of the team that captured it (yellow/gold or purple) and is indicated on the scoreboard. An uncontested control point is white and is also indicated on the scoreboard.
Player Respawn
Unlike other Warzones, when you get killed, you do not respawn at a spawn point straight away (and get stuck behind a door). Instead, you lay on the ground until the respawn timer runs out, then you are automatically resurrected at one of the Spawn Points indicated on the Map above. The timer (as far as I can tell) runs on a 14-second window. So every 14 seconds, players who’ve been killed in that 14-second window will get automatically spawned at one of the 4 Spawn Points at random.

Battle Mods
There are four different types of Battle Mods, which spawn in four different locations (see the map above) and are randomised meaning you could end up with any of them when you pick up a Battle Mod from a spawn location. All Battle Mods have a 3 second cast time.
- Green – Control Point Activate Slice: use while inside a deactivated Control Point to activate it for the remaining duration of the round.
- Blue – Control Point Multiplier Slice: use while inside an activated Control point to multiply the score gained at the location for the remaining duration of the round. This effect stops after the end of the round when the Control Point deactivates. The Control Point tick rate is ‘sped up’ to 0.5 seconds.
- Orange – Control Point Speed Up Slice: use while inside an active Control Point to increase the rate at which points are scored for that location. This does not increase the number of points, only the speed at which they are added to the owning team’s score.
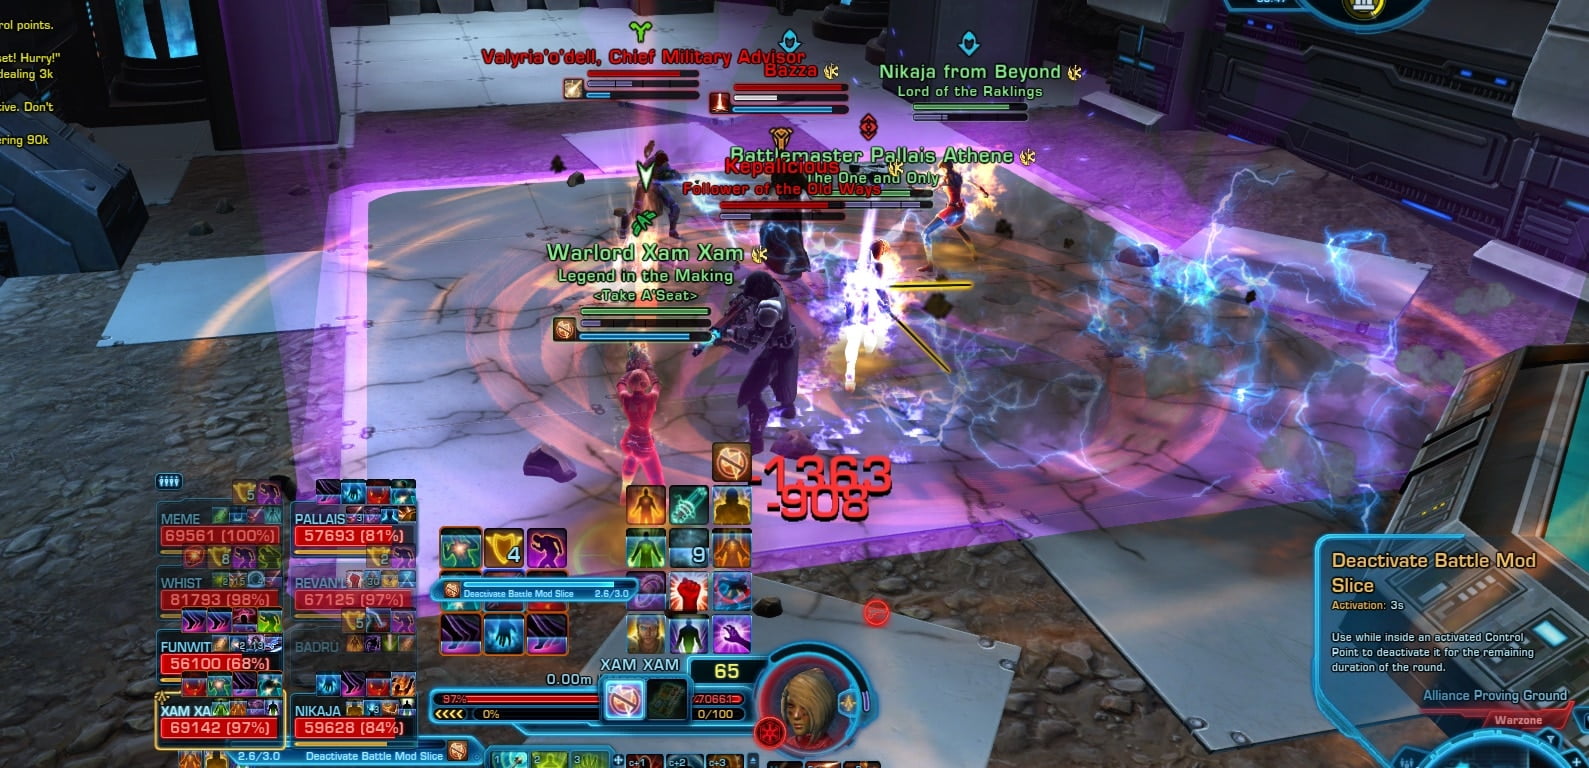
- Red – Control Point Deactivate Slice: use while inside an activated Control Point to deactivate it for the remaining duration of the round.
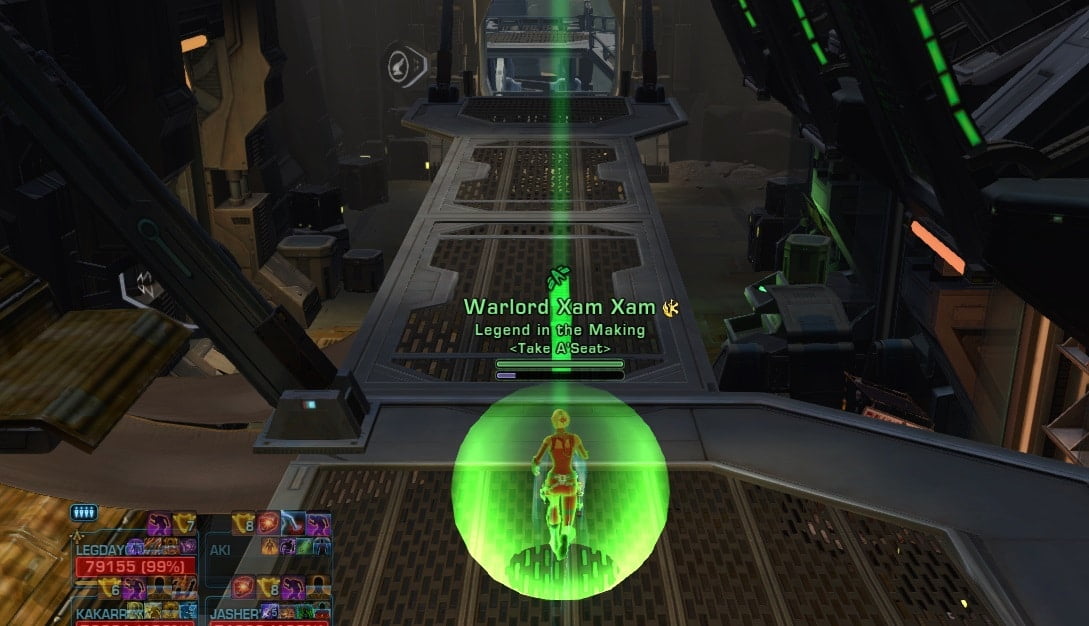
A player carrying a Battle Mod will have a ‘beam’ protruding out of them with a symbol spinning around above their head, as pictured below (colour will depend on which Battle Mod they’re carrying). A player can hold a Battle Mod indefinitely until they either die, use it or pass it to another player.
When a Battle Mod has been used on a Control Point, it will show up on the Scoreboard. In the image below, you can see that the Artifact Room Control Point has both a Double Point and a Speed Up Mod on it.

Additionally, if you kill a player who is carrying a Battle Mod, the Player closest to them gets the Battle Mod.

If you see someone on the enemy team attempting to place a Battle Mod on a Control Point, you can stop them from using it by using a knockback, stunning them or using your interrupt. Attacking them doesn’t stop the Battle Mod channel.
Battle Mod UI
When you pick Battle Mod (Slice), a temporary UI pops up (like when you get the ball in Huttball). It gives you two options. You can either place the Mod in a Control Point (when in the appropriate area/circumstance the UI lights up when you can use it) or give the Mod to another player. You have to select a player to hand off the Battle Mod (Slice) and be within 10 meters of them.

How to get Objective Points
Currently, there are a couple of ways to get Objective Points:
- Players who capture a Control Point will get 1000 Attacker Objective Points.
- Players in the vicinity of a Control Point (larger than the control point area but smaller than the room) will get 25 Objective Points for attacking/defending a Control Point (not sure what the time interval is yet).
- Using an Activate or Deactivate Battle Mod on a Control Point grants a player 1000 Attacker Objective Points. Using a Multiply or Speed Up Battle Mod grants 1000 Defender Objective Points.
Tips for getting accustomed to Odessen Proving Grounds
- LEARN THE MAP! I cannot emphasize enough how much easier a time you will have with understanding what is going on in this Warzone by learning the map. Get to know where the Control Points are, what they look like and the environment around the Control Points (they all look different, as their namesakes suggest). Learn to read the map and scoreboard together. Once you get used to the orientation of the map and get a sense of direction, you’ll have no issues.
- Remember, the key to victory is simply to capture Control Points and reach 600 points. It’s that simple. Kills have zero impact on the score (although killing the other team at a Control Point whether you’re defending or attacking is important too). Once you get to know how the Control Points work and where they all are, then you can worry about Battle Mods.
Advanced Tactics
Ranged DPS/Healers
If there are already a couple of your teammates standing inside a Control Point stand outside of it so if they get knocked out, you can run in and keep the Control Point for your team.
Another strat for healers/ranged DPS is standing on the suspended walkways and stage above the Cantina Control Point and killing anyone defending/attacking or healing your teammates as they attack or defend.
Control Point Deactivate Slice
The obvious use of this Battle Mod is to use it on one of the enemy team’s Control Points. But an alternative use for it is if a Control Point your team has captured is being overwhelmed by the enemy team, you could use a Control Point Deactivate Slice to prevent the other team from capturing the Control Point.
Class/Role Specific Tips
Healers
Unfortunately, unlike other Warzones, there are very few line of sight (LOS) points for healers near the Control Points. There are (very) select Control Point spawn locations where there are objects or the environment where you can LOS damage but you have to sacrifice being inside a Control Point which could mean losing a Control Point. Depending on how many teammates there are, however, it may be beneficial to be outside the Control Point. But it is crucial to be on standby to get inside the Control Point if your team is knocked out of it (this works for ranged DPS classes too). Again, this will be heavily situation-dependent. For the most part, healers are out in the open with little protection from incoming damage. Although if you have a pocket tank you’ll ace this map.
Classes with Knockbacks
Simply knocking an enemy out of a Control Point and then stunning is sometimes enough to win the Control Point for your team. Sith Inquisitors/Jedi Consular classes specced into the Electric Bindings/Force Wake utility have the added advantage of snaring the target for a short amount of time. Once the snare is over you can then stun them to ensure they don’t have time to get back inside the Control Point area.
Assassin/Shadow Tanks and Powertechs/Vanguards
Assassins /Shadow Tanks or Powertechs/Vanguards can use Force Pull or Grapple/Harpoon to pull an enemy away from a Control Point and then stun them so they lose the Control Point. This can be especially effective when standing on the suspended walkways above the Cantina Control Point. You can also pull annoying ranged DPS or healers down from the suspended walkways to you and your teammates defending the Cantina Control Point so you and your teammates (especially melee DPS) can kill them.
Stealth Classes
Stealth classes CAN NOT DEFEND a Control Point while they are stealthed. If you stealth while in a Control Point and you are the only one on your team inside it, your team will lose the Control Point.
Another important thing to note for Stealth Classes is they CAN NOT stealth while holding a Battle Mod.
Thank you for reading my guide! If you have any tips, suggestions or questions about my guide, let me know/ask!
A special thank you to Jerba and Moonstorm for helping and assisting me with this guide!