Levelling in New World was quite a tedious process when the game first launched. Now levelling is a lot faster and more streamlined with the ongoing revamp to the Main Story Questline (which will be completed by the end of 2023). With the Rise of the Angry Earth Expansion launching, now has never been a better time to level a character in New World!
Here are some levelling tips and tricks for new and returning players.
(Returning Players) Should I start a New Character in New World?
If you have previously played the game and feel completely lost on your old character, it may be worth starting over again. You can now have multiple characters on the same server too. So once you’ve familiarised yourself with the game, you can always go back to your main character or transfer items from your old character to your new one.
The Key to Success in New World!
The key to success in New World is not to focus on levelling fast but to start preparing for endgame as you level. Think long-term with how you spend your time and what you do as you’re levelling and you’ll have an easier time when you get to endgame.
Make Gathering/Survival Tools ASAP
All you need to do is gather extra Flint and Wood from bushes when you’re on the ‘Basic Needs’ quest (at least 4 Flint and 4 Wood). Then you can go to the Watcher’s Campfire and craft a Flint Skinning Knife and a Flint Mining Pick, Flint Harvesting Sickle and Flint Logging Axe. Make sure you equip them.
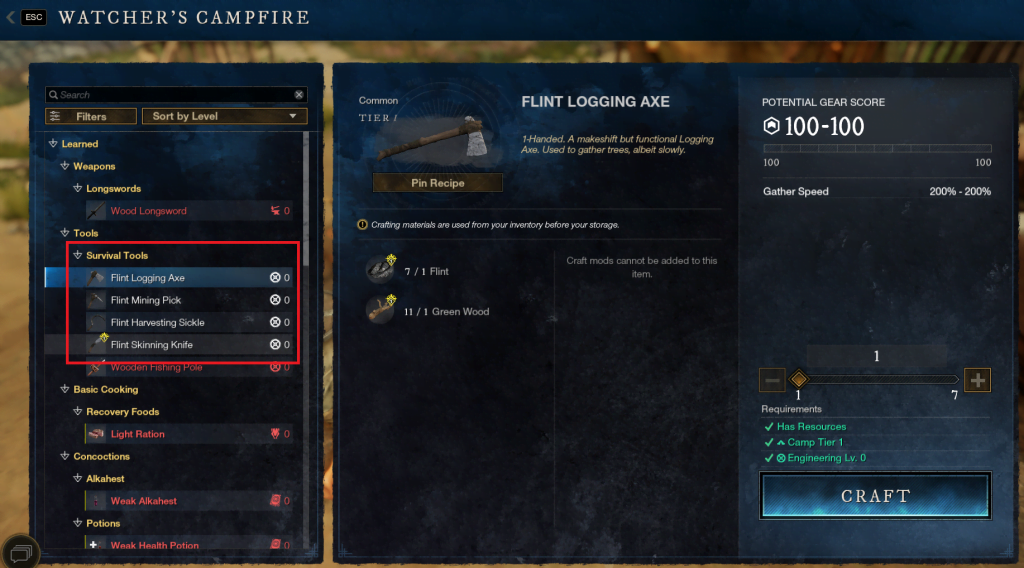
Now that you have all four gathering tools, you can start levelling your gathering skills. Crafting is an integral part of the game so the sooner you can level your Crafting Professions the better. Gathering and Crafting is also a great source of XP.
Even if you are not interested in Crafting in New World, I would strongly recommend levelling Gathering Skills at least so you can make Gold off the raw materials you gather.
Take Advantage of all XP Sources
There are many ways to earn XP while levelling in New World besides doing Quests. Here’s a list of different ways you can earn XP.
- Quests
- Main Story Quest (MSQ)
- Side Quests
- Faction Quests
- Town Board Missions
- Mount Questline
- Exploration
- Discovering Locals (POIs)
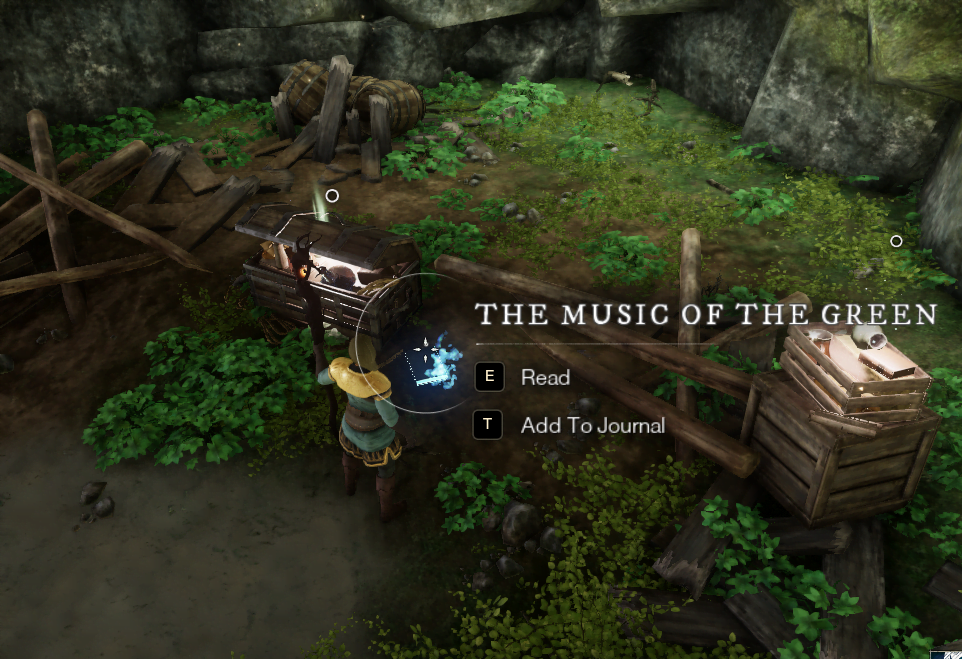
- Lore Books
- Spirit Shrines
- Crafting
- Gathering Materials
- Refining Mats
- Crafting Items
- Killing AI Mobs
Quests
While your focus should be on the MSQ, I recommend doing some side quests alongside the MSQ, especially in your first zone and Everfall. Side Quests in low-level revamped zones are almost always located close to the MSQ or are in the zone’s Settlement so you will very rarely have to go out of your way to complete them. Plus it gives you the opportunity for more gear and XP.
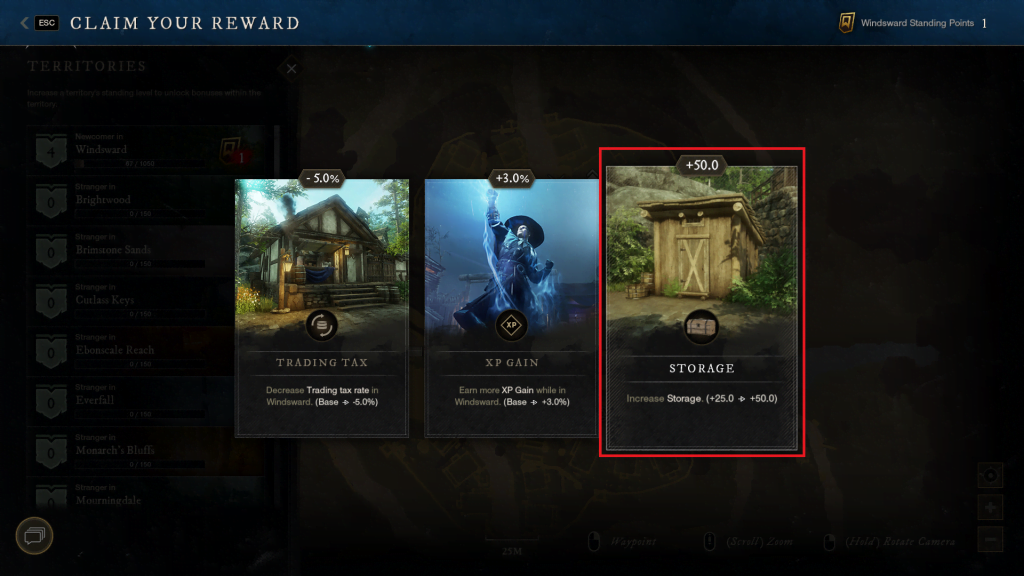
Completing Town Board Missions will give you Territory Standing and levelling XP. Increasing your Territory standing allows you to choose perks that can be incredibly useful such as increased Storage Capacity. Higher Territory Standing will also allow you to buy a higher-tier house later on. More info about Territory Standing can be found later in this guide.
Exploration
It is very important to discover Spirit Shrines and Settlements as you level for faster travel and to gain more storage. For example, whether you are starting out in Monarch’s Bluffs or Windsward, take the time to travel to the Cutlass Keys Settlement, Spyglass Ridge. The MSQs for both regions will take you somewhat close to Cutlass Keys.
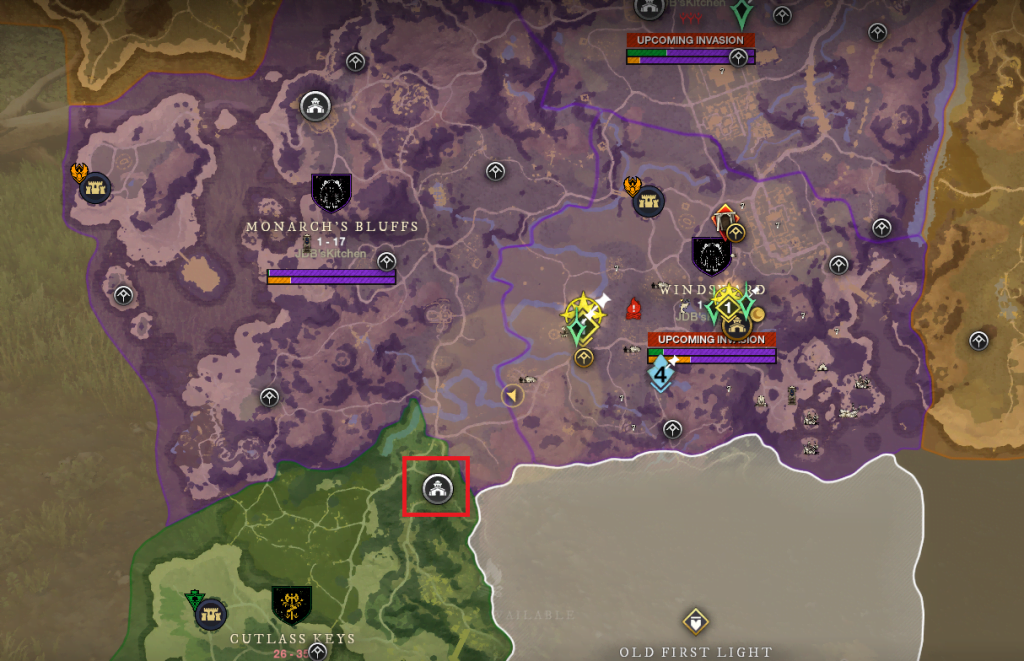
More often than not, POIs will have at least one Lorebook lying around and Settlements will usually have a few. So keep an eye out! Clicking them gives a nice little bump of XP.
Crafting
Anything you do in regards to crafting will give you XP. Whether it be chopping down a tree, harvesting herbs, refining rawhide or even crafting a Potion. I would strongly recommend taking the time to gather materials as you’re going from place to place doing the MSQ. The rule I follow when levelling alts is to always go back to Settlement with a full bag (of materials). Once you get back to Settlement take the time to refine the materials you gathered. Refined materials take up less space in Storage than raw ones so this will help you manage your Settlement Storage.
Loot all Mobs and Chests
My general rule of thumb is if I aggro something, I kill it. Whether it be a Beast or an AI mob at a POI there’s a good chance it will drop something useful and if it’s Beast, you can Skin it. Mobs and chests can drop mats that are pretty valuable and desirable for endgame players which you can put up on the Trade Post. This will give you a head start on accumulating gold.
If the gear drops you’re getting aren’t that great, you can salvage them for repair parts and a small amount of gold.
Get your Mount ASAP
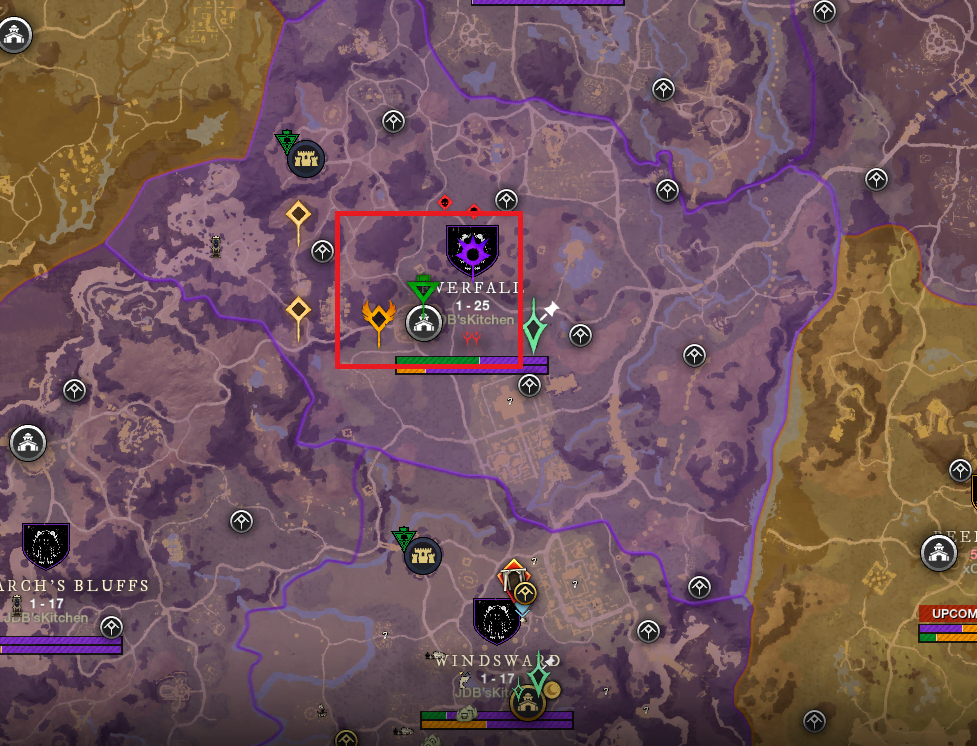
If you have purchased the Rise of the Angry Earth Expansion, make sure you go and do the Mount Quest ‘My Kingdom for a Horse’ as soon as you get to level 25 and/or Everfall. This will make traversing around Aeternum much faster! The quest is in northern Everfall so make sure you discover the Settlement then head up north to get the Mount.

Be sure to gradually do the Mount Questline to get more XP and to level your Riding Trade Skill to increase your Mount Speed and get other rewards.
Pick a Faction so you can start Levelling Reputation
When you get to Everfall, you will see the initiation quests for all 3 factions on the Map (they appear on the Map at Level 17). Play through the initiation quests for all three factions for the XP and then pick the one you want to go with. Once you pick a Faction, you will have to do faction quests to level your Reputation with your Faction.
Factions give you access to more Quests (so more ways to get XP), open-world PvP, spirit shrine travel discounts and various unique items on the Reputation Vendor that are very useful for crafting, Transmog etc.
Try to have your Gathering Professions close to 100 by the time you’ve finished in Everfall or Brightwood
It’s not super necessary but a good idea to be at least close say 80+ by the time you’re finished in Everfall. The next zone Brightwood is where you start to see more of the next tier of materials (Silkweed, Starmetal and Wyrdwood) more frequently. These materials require you to be level 100 in the appropriate gathering skill to gather them. Note Skinning 100 isn’t needed until the zone after, Weaver’s Fen, as beasts level 31-50 will drop the next tier of hide, Thick Hide (level 51-62 beats drop Iron Hide).
Choosing Territory Perks
Think long-term when picking Territory Standing Perks. I would recommend picking increased storage perks & increased Territory standing over other perks. You may not need the storage room now, but eventually, you will. There is little point to picking the XP gain perk as you only get limited use out of it and you don’t really need it anyway with the plethora of easy ways to gain XP. As you get to higher levels you may want to pick Trading Tax or Crafting Fee reductions. Otherwise, go with the Housing-related Perks.
Buying a House
What are the benefits of owning a House?
- Increased Storage Capacity – Depending on the size of the house, you can place Storage Chests in your house to increase storage capacity in the settlement your home is located in.
- Tier 1 House – 1 Storage Chest
- Tier 2 House – 2 Storage Chests
- Tier 3 House – 3 Storage Chests
Tier 4 House – 4 Storage Chests
- Free Teleportation to Settlement (without Spirit Shrine) – cooldown varies based on the size of the House (you can use Azoth to teleport sooner).
- Tier 1 House – 4 hours
- Tier 2 House – 3 hours
- Tier 3 House – 2 hours 30 minutes
- Tier 4 House – 2 hours
- Trophies – you can put up to 5 trophies in a house regardless of it’s tier. Trophies provide bonuses to crafting, gathering and luck.
I would recommend saving up for Tier 3 and 4 Houses to maximise your storage potential in the future. The first House you purchase will be discounted. So keep this in mind when buying your first Home.
Additional New World Tips
- Free Musical Instruments – There is no need to craft musical instruments to start with. You can get a set of musical instruments for free by doing the ‘The Magnum Opus’ Questline in Everfall. You will find the quest in the Everfall Inn.
- Town Board – Hold on to fish bait, low-level food and potions. All of these items are commonly Town board turn-in items so again, easy XP!
- Crafting – if you don’t have the resources needed to craft an item, you can click on the material dropdown menu and untick ‘Owned’ to see the materials you can use.
- Start Organising your Storage Early – this will make things so much easier once you reach endgame. Start by choosing which settlement to store which mats. Once you get three houses it will be easier to keep materials needed for particular crafting together.
- Starting Tip – Store your Alchemy materials and do Alchemy crafting in a settlement that has a stream or a body of water in it. This way, you will have unlimited access to water when needed. Eg. Windsward, Brimstone Sands, Mourningdale and Ebonscale Reach.
Thank you for reading this New World guide! If you have any questions about any of my tips or something I didn’t mention, you are more than welcome to leave a Comment and I will respond as soon as I can.

