An overview of the Rage Juggernaut Discipline. This guide covers abilities and passives, utilities, gearing and stats, rotations and some tips.
Written by Andynul, edited by Xam Xam.
Sith Warrior Abilities and Passives
| Ability Name | Details | Ability Type |
|---|---|---|
| Assault | Generates 2 Rage dealing X amount of weapon damage. | Type: Melee Range: 4 Meters |
| Channel Hatred | Channelled 15 seconds; Regeneration health outside of combat. | |
| Disruption | Interrupt the current action and prevent that ability to be used for the next 4 seconds. | Cooldown: 12 Seconds Range: 4 Meters |
| Force Charge | Jumps to a distant target dealing X amount of weapon damage, immobilizing that target for 2 seconds interrupting their current action. Build 3 Rage. Cannot be used against targets in cover. Ability Charge 1 Stack 15 seconds recharge | Type: Melee Cooldown: 15 Seconds Range: 10 – 30 Meters Ability Charge 1 Stack 15 seconds recharge |
| Force Choke | Chokes the target, stunning the target for 4 seconds. Dealing x amount of Kinetic damage builds 3 Rage during the duration. This ability can be channelled while moving. | Type: Force/Kinetic Cooldown: 1 Minute Range: 10 Meters |
| Force Scream | Deals x amount of Kinetic damage. In addition, Standard and Weak enemies are stunned for 4 seconds. | Type: Force/Kinetic Cooldown: 12 Seconds Range: 10 Meters Cost: 4 Rage |
| Furious Power | Consumes all the ability charges of Furious Power and applies Furious Power stacks to you. Each stack increases your next direct single-target melee attack by 25% and is consumed whenever you deal damage with these attacks. Recharges 1 ability charges every 30 seconds.Ability Charge: 4 stacks 30 seconds recharge | Cooldown: 30 Seconds Ability Charge: 4 stacks 30 seconds recharge |
| Intimidating Roar | Paralyzes up to 8 enemies in fear preventing any actions for 6 seconds. Damage ends the effect prematurely. | Cooldown: 1 Minute |
| Mad Dash | Madly dashes forward 20 meters dealing X amount of damage and increasing your defence chance by 100%. Can not be used while immobilized or hindered. | Type: Melee Cooldown: 45 Seconds |
| Ravage | Deals x weapon damage. | Type: Melee Cooldown: 18 Seconds Range: 4 Meters |
| Saber Ward | Increases Melee and Ranged defences by 50% and absorb 25% of damage coming from force and tech attacks. Last 12 seconds. | Cooldown: 3 Minutes |
| Shii-Cho Form | Utilize a balanced lightsaber form, increasing all damage dealt and reducing all damage received by 3% | |
| Smash | Smashes up to 8 enemies within a 5-meter radius dealing X amount of kinetic damage. Stuns standard and weak enemies for 2 seconds. | Type: Force/Kinetic Cooldown: 15 Seconds Range: 5 Meters Cost: 3 Rage |
| Sweeping Slash | Slashes up to 8 enemies within 5 meters in front you dealing X amount of damage. | Type: Melee Range: 5 Meters Cost: 3 Rage |
| Unleash | Purges incapacitating and movement-impairing effects. | Cooldown: 2 Minutes |
| Unnatural Might | Increases the targets Melee, Ranged, Force, and Tech damage and healing bonus by 5% for 60 minutes. | Cooldown: 6 Seconds Range: 30 Meters |
| Vicious Slash | Deals x weapon damage. | Type: Melee Range: 4 Meters Cost: 3 Rage |
| Vicious Throw | Usable on targets at or below 30% Max Health. | Type: Melee Cooldown: 10 Seconds Range: 10 Meters Cost: 3 Rage |
Sith Juggernaut Abilities
| Ability Name | Details | Ability Type |
|---|---|---|
| Chilling Scream | Chills up to 8 enemies within 8 meters dealing X amount of elemental damage, and reducing movement speed by 50% for 8 seconds. | Type: Force/Elemental Range: 8 Meters Cost: 2 Rage |
Endure Pain | Temporarily increases your maximum health by 30% for 10 seconds. When the effect ends, the health is lost. | Cooldown: 1 Minute |
| Enrage | Immediately increase 6 Rage | Cooldown: 45 Seconds |
| Enraged Defense | Gain 12 Stacks of Enraged Defense when you take damage a stack will be consumed giving you X amount of health. This ability can be used while stunned but not while your health is above 70% health. | Cooldown: 2 Minutes |
Force Push | Knocks the target back several meters and knocks the target down for 2 seconds. Force Push finishes the cooldown of Force Charge. | Type: Force/Kinetic Cooldown: 1 Minute Range: 10 Meters |
| Guard | While active, the guarded player takes 5% less damage and generates 25% less threat. In addition so long as you remain within 15 meters of the guarded player, 50% of all incoming damage from enemy players is transferred back to you. You deal 50% less damage while guarding. | Range: 30 Meters |
| Intercede | Leaps to a friendly target dropping their threat by a moderate amount and reduces the damage taken by 20% for 6 seconds. | Cooldown: 20 Seconds Range: 30 Meters |
Retaliation | Can not be parried, dodged, or missed. Can only be used after successfully defending against a melee or ranged attack, or after one of your melee attacks was parried, dodged, or missed. | Type: Melee Cooldown: 6 Seconds Range: 4 Meters Cost: 2 Rage |
| Saber Reflect | Reflects all single-target damage that is ranged, Force, or tech attacks back to the attacker for 3 seconds. | Cooldown: 1 Minute |
| Saber Throw | Throws the main hand weapon to a distant target. Builds 3 Rage. | Type: Melee Cooldown: 30 Seconds Range: 30 Meters |
| Sundering Assault | Generates 5 Rage dealing X amount of damage causing the target to become sundered. Sundered targets have their armour reduced by 20% for 45 seconds. | Type: Melee Cooldown: 12 Seconds Range: 4 Meters |
| Taunt | Taunts the target forcing it to attack you for 6 seconds. Player targets deal 30% less damage when attacking anyone that’s not you for 6 seconds. | Cooldown: 15 Seconds Range: 30 Meters |
| Threatening Scream | Taunts all targets within 15 meters forcing them to attack you for 6 seconds if you are in Soresu Form. If not in Soresu Form, the threat is immediately dropped by a moderate amount. Player targets deal 30% less damage when attacking anyone that’s not you for 6 seconds. | Cooldown: 45 Seconds Range: 15 Meters |
Rage Discipline Abilities
| Ability Name | Details | Ability Type |
|---|---|---|
Raging Burst | Blasts the enemy target with a powerful burst of Force energy, dealing X – X kinetic damage. | Type: Force/Kinetic Cooldown: 12 Seconds Range: 10 Meters Cost: 3 Rage |
| Obliterate | Jumps to a target, dealing X weapon damage and immobilizing it for 1 second. Can be used while immobilized. Strikes with both weapons if dual wielding. | Type: Melee Cooldown: 12 Seconds Range: 10 Meters Cost: 2 Rage |
| Force Crush | Progressively slows the target from 50% to 5% movement speed over 3 seconds and deals X kinetic damage each second. At the end of the duration the target is crushed and takes an additional X kinetic damage. | Type: Force/Kinetic Cooldown: 18 Seconds Range: 10 Meters Cost: 3 Rage |
| Furious Strike | Strikes the target for X weapon damage. Attacks with both weapons if dual wielding. | Type: Melee Cooldown: 9 Seconds Range: 4 Meters Cost: 5 Rage |
Sith Juggernaut Passives
| Ability Name | Details |
|---|---|
| Blade Turning | First 2 seconds of Saber Ward grants 100% melee and ranged defence. |
| Endless Rage | Generates 1 rage when attacked. This effect cannot occur more than once every 6 seconds. |
| Raging Assault | Reduces the cooldown of Sundering Assault and Aegis Assault by 3 seconds each and increases the rage they generate by 2. |
| Single Saber Mastery | Increase the damage dealt by your weapon by 20%. |
Rage Discipline Passives
| Ability Name | Level Granted | Details |
|---|---|---|
| Decimate | 12 | Increases the damage dealt by Smash by 40% and reduces the cooldowns of Smash and Raging Burst by 3 seconds each |
| Shii-Cho Mastery | 16 | Increases armour penetration by 15% and Force attack damage by 3% |
| Saber Strength | 20 | Increases the damage you deal with saber attacks by 5% |
| Dark Resonance | 24 | Increases the critical strike damage of all attacks by 15% |
| Battle Cry | 28 | Reduces the cooldown of Obliterate by 3 seconds and causes Force Charge and Obliterate to make your next Force Scream deal 5% more damage and generates 1 rage, rather than consume rage. |
| Overpower | 32 | Assault, Sundering Assault, Vicious Slash, Sweeping Slash, Retaliation, Force Scream, Vicious Throw, and Furious Strike reduce the active cooldowns of Smash, Raging Burst, and Obliterate by 1 second and Enrage by 2 seconds. |
| Dominate | 36 | Force Charge and Obliterate make your next Smash or Raging Burst used within 20 seconds an automatic critical hit |
| Cascading Power | 40 | Increases all damage dealt by 5% for 6 seconds after dealing damage with Smash or Raging Burst. This effect cannot occur more than once every 8 seconds. |
| Shockwave | 44 | Enrage and Force Crush grant Shockwave, increasing the damage dealt by your next Smash or Raging Burst consume no rage. Additionally the cooldown of Enrage is reduced by 15 seconds and Enrage generates 6 additional rage over 6 seconds when used. |
| Gravity Manipulation | 48 | Obliterate and Force Crush each consume 1 less rage |
| Brutality | 52 | Increases the critical strike chance of Vicious Throw and Furious Strike by 15%. Additionally, Intercede now purges all Movement-impairing effects. |
| Force Lash | 56 | Vicious Slash, Sweeping Slash, and Retaliation deal X -X additional Force energy damage. |
| Furious Power | 60 | Furious Strike enables Retaliation and beats down its target for 45 seconds. Beat Down targets take 5% more damage from melee attacks. |
| Enveloping Rage | 64 | Activating Raging Burst or Smash increases your damage reduction by 10% for 6 seconds. This effect cannot occur more than once every 8 seconds |
| Fuming Rage | 68 | Force Crush grants Fuming Rage, making your next Obliterate or Furious Strike consume no rage. |
Utilities
Skillful
| Skillful Utility | Description | Comments |
|---|---|---|
Payback | Reduces the cooldown of Unleash by 30 seconds and causes Unleash to heal you for 10% of your maximum health when used. | Good to have a lower cooldown on your CC breaker mainly for PvP. |
Warmonger | Getting attacked reduces the active cooldown of Force Charge by 1 second. This effect cannot occur more than once every 1.5 seconds | Can be used for PvP. Can be used in PvE when you have to leap around for extra interrupts or if a boss teleports. |
Overwhelm | Ravage immobilises the target for 3 seconds. | Can be used for PvP. |
Path Carver | Sweeping Slash deals 25% more damage. | With Cut to Pieces Tactical this Utility becomes useless. |
Deadly Reprisal | Taking non-periodic area of effect damage generates 2 rage. This effect cannot occur more than once per second. | More Rage. |
Unyielding  | You generate 4 rage when stunned, immobilised, put to sleep, or knocked around. | More Rage. |
Pooled Hatred | Whenever your movement is impaired you gain a 10% damage bonus to your next ability that consumes rage. This effect can stack up to 5 times and lasts 15 seconds. | Depends on the fight if your movement is impaired. Also perfect for PvP. |
Sonic Wall | Threatening Scream protects all allies within range, excluding yourself granting Sonic Wall, which absorbs a moderate amount of damage. Last 10 seconds. | This can help reduce some damage around the tanks and other melee DPS’ers. |
Masterful
| Masterful Utility | Description | Comments |
|---|---|---|
Crushing Fist | For Immortal discipline Smash slows the targets it damages by 60%for 10 seconds. For Vengeance and Rage disciplines Smash and Vengeful Slam sunder the targets they damage for 45 seconds. Sundered targets have their armour rating decreased by 20% | This is perfect to give an AoE armour penetration. |
Strangulate | Reduces the cooldown for Force Choke by 15 seconds. | Mainly for PvP, can take in PvE if you need to stun faster like Turrets on Nahut. |
Unstoppable | Force Charge grants Unstoppable granting immunity to movement-impairing effects and effects that push or pull around for 4 seconds. | In Vengeance you already have this immunity. |
Unshackling Rage | Activating Enrage purges movement-impairing effects and increases your movement speed by 50% for 6 seconds. | Useful when you need speed. |
Seething Hatred | When you exit combat the active cooldown of Force Charge, Enrage and Saber Throw are reduced by 100% | Okayish for PvP, would be okay for questing. |
Hardened Defense | For Vengeance and Rage all area effect damage is reduced by 60% for 15 seconds after Threatening Scream is activated. For Immortal all damage is reduced by 30% while stunned. | Must take for fights your going to take AoE damage great combo with the Sonic Wall Utility. |
Through Power | Enraged Defense increases your movement speed by 50% and grants immunity to movement-impairing effects while active. | Mainly for PvP. |
Consuming Rage | Endure Pain removes all cleansable effects when activated. | Self Cleanse A MUST Take Utility on fights that you want to Self Cleanse on. |
Heroic
| Heroic Utility | Description | Comments |
|---|---|---|
War Bringer | Force Charge enables your next Vicious Throw or Hew to be used against a target with any percentage of health. Lasts up to 15 seconds. | If you can get leaps in a boss fight and not sacrifice anything important Utility or Ability wise. |
Through Passion | Reduces the cooldown of Enraged Defense by 30 seconds. | Must Take for PvE and PvP helps get a DCD back faster. |
Through Victory | Mad Dash can be used while immobilized, purges movement-impairing effects when activated and deals 50% more damage. Additionally the cooldown of Mad Dash is reduced by 10 seconds | Always take if you can its a better Utility over Through Power Utility. |
Piercing Chill | Chilling Scream pierces enemies with an aching chill, dealing X elemental damage to all affected targets over 8 seconds. Additionally Chilling Scream grants Chilling Speed increasing your movement speed by 35% for 8 seconds. | If you want more speed on fights like Hateful. Useful in PvP as Chilling Scream is your slow. |
Thrown Gauntlet | Reduces the cooldown of Force Push and Intimidating Roar by 15 seconds. Additionally Saber Throw immobilizes the target for 3 seconds. | Mainly for PvP, can take in PvE if you need to stun faster like Turrets on Nahut. |
Extending Roar | Increases the range of Force Scream to 30 meters but Force Scream deals reduced damage beyond 10 meters. Additionally Force Push deals 20% more damage and grants Extending Roar allowing your next Force Scream to deal full damage regardless of the distance from the target. | Very limited for PvE not worth taking. It has some merit in PvP. |
Intimidating Presence | Force Charge finishes the cooldown on Disruption. In addition Saber Reflect lasts 2 seconds longer and if Soresu form is being utilized generates a high amount of threat on all enraged enemies within 30 meters when activated. | Helps get several interrupts and extra time on your reflect. Can be situational for PvE, extra time on a reflect in PvP could save your life. |
Reckoning | Intercede grants Reckoning, increasing the damage dealt by your next melee ability by 20%. This effect lasts for 10 seconds. Additionally reduces the cooldown of Intercede by 5 seconds and reduces the threat and damage taken by an additional 10% each for the friendly target of Intercede. | Great for PvP, it can depend on how often you use Intercede in boss fights. |
Gearing and Stats
With 6.0 gearing unlike previous expansions, there is more than one option of gear choices and different levels of what is considered best in slot on the content you’re playing in.
Amplifiers
With 6.0, the amplifiers were introduced into the game. What are Amplifiers?
They are buffs that come on your gear (Shell, Armoring, Mod, Hilt, Barrel, Relics, Earpiece, Implant). They can buff you on multiple aspects like combat (increasing your damage reduction, damage dealt, healing output), crafting and gathering (efficiency) and even some quality of life/rewards (flashpoint, operations, pvp, more experience).
Each amplifier can come on 4 tiers (Premium, Prototype, Artifact and Legendary) and every time you obtain a piece, it can come with a random amplifier that you can reroll until you get the one you want. For each slot, there are different kinds of amplifiers.
- Shells: Crafting and quality of life (combat if Amplified Champion Shell)
- Armorings/Hilts/Barrels: Combat
- Mods: Crafting and quality of life
- Implants/Earpiece: Crafting and quality of life
- Relics: Crafting and quality of life
I would recommend getting Combat amplifiers first before going after crafting or quality of life as rolling amplifiers can get pricey.
| Name | Description | Percentage Max |
|---|---|---|
| Armour Penetration | Kinetic and Energy damage attacks ignore a portion of the target’s armour | 2.50% |
| Periodic Intensity | Increases the damage dealt by periodic effects | 2.20% |
| Force Sensitivity | Increases the damage dealt by Force attacks | 1.00% |
| Weapon Expertise | Increases the damage dealt by weapon attacks. | 1.20% |
I recommend using Armour Penetration amplifiers as most of your damage profile is mainly kinetic or already provides armour penetration.
Tacticals
Tacticals is a new 15th item on your character sheet that can change how abilities work and possibly change rotations around.
Juggernaut Spec Tacticals
| Tacticals | Description | Source |
|---|---|---|
| Grit Teeth | The cooldown of Enraged Defense is reduced by 2 seconds when you are attacked. This effect cannot occur more than once per second | Crafted – Biochem |
| Higher Focus | Enraged builds one Furious Power ability charge | Conquest Crates |
Rancor’s Tail | Activating Saber Ward finishes the cooldown of Force Push | PvP Crates |
| Throwing Arm | Saber Throw lowers the targets accuracy by 70% for 6 seconds. | PvP Crates |
Rage DPS Tacticals
| Tacticals | Description | Source |
|---|---|---|
Unknowing Ancient Text | Force Crush builds a Furious Power ability charge | Operation Bosses |
| Joiner’s Pressure | Activating Force Push on a target affected by Force Crush grants Joiner’s Pressure increasing your damage dealt by 20% for 10 seconds | Operation Bosses |
Syn’s Second Amulet | Retaliation refunds one rage and finishes the cooldown of Furious Strike | Flashpoint Bosses |
Fury DPS Tacticals
| Tacticals | Description | Source |
|---|---|---|
Causterised Coronary | Furious Strike causes its target to bleed | Operation Bosses |
Enrage Crush | Raging Burst and Smash detonate Force Crush dealing Force Crush’s remaining damage up to 8 enemies in an area around the primary target | Flashpoint Bosses |
Force Barter | Furious Strike refunds one additional rage after it hits but refunds all its rage if you have fallen to zero | Flashpoint Bosses |
| Perseverance | Using Obliterate with Furious Power causes it to critically hit | Daily/Weekly Mission Crates |
Recommended Tacticals
- PvE Single Target Tactical: Causterised Coronary
- PvE AoE Target Tactical: Enrage Crush
- Solo Ranked PvP Tactical: Grit Teeth
- Team Ranked PvP Tactical AoE Pressure: Enrage Crush
- Team Ranked PvP Tactical Focused Fired: Grit Teeth
Set Bonus and Stats
Sith Warrior Set Bonuses
| Gear | 2 Set | 4 Set | 6 Set | Source |
|---|---|---|---|---|
| Descent of the Fearless | Mastery +2% | Whenever you gain or use a Furious Power ability charge while in combat your damage is increased by 10% for 10 seconds. | Dealing damage has a 10% chance to build a Furious Power ability charge. Can only occur once every 5 seconds | Daily/Weekly Mission Crates |
| Nimble Master | Alacrity +2% | Force Charge gets two charges | PvP Crates | |
| Perfect Form | Mastery +2% | Vicious Slash and Massacre deal 5% more damage | Vicious Slash, Massacre, and Sweeping Slash add Vicious Thirst stacks to their targets stacking up to 5 times. Killing an enemy with Vicious Thirst stacks increases your damage by 3% per stack for 10 seconds. | PvP Crates |
| The Undying | Endurance +2% | After executing Mad Dash you gain 20% damage reduction for 6 seconds | Conquest Crates | |
| Tormented | Power +2% | After Force Choke stun effect finished, it slows its target and every target nearby it for 6 seconds | PvP Crates | |
| Force Bound | Accuracy Rating +2% | Enemies affected by Intimidating Roar have greatly reduced accuracy for 6 seconds after Intimidating Roar wears off | Crafting – Synthweaving |
Juggernaut Set Bonuses
| Gear | 2 Set | 4 Set | 6 Set | Source |
|---|---|---|---|---|
| Flawless Riposte | Mastery +2% | Retaliate no longer has a cooldown | Taking damage during Endure Pain grants Retaliator stacks increasing the damage of your next retaliation by 10% per stack | Operation Bosses |
| Fulminating Defense | Endurance +2% | Threatening Scream gets two charges. | Endure Pain increases Elemental and Internal damage reduction by 75% for 3 seconds. | Dxun Operation, Unidentified Boxes |
| Lord of Pain | Endurance +2% | Threatening Scream’s cooldown is reduced by 5 seconds | Threatening Scream increases your damage reduction by 2.5% for each enemy it hits. This effect lasts 10 seconds | Operation Bosses |
Recommended Set Bonuses
I recommend getting 1 Amplified Champion Set Piece to provide an extra combat amplifier. I also recommend making the Amplified Champion piece a Head Piece for PvE so that you don’t lose your set bonus when doing Dreadful or Hateful Entities.
- PvE DPS Build: Descent of the Fearless
- PvE Survivability Build: Force Bound; Lord of Pain
- PvP DPS Build: Descent of the Fearless
- Ranked PvP Build: Force Bound; Descent of the Fearless
Stats
With stats, there are several versions of Best in Slot for PvE as there is level 70 and level 75 content. In all level 70 content (capped content, Legacy Raids) your Mastery, Endurance, and Power is capped. In level 75 content (Dxun/Nature of Progress, PvP, Objective Meridian) nothing is capped.
Level 75 PvE Stats
- Power – 10,082
- Armourings – 8 Versatile Armouring 80 / 80R-1
- Hilt – 1 Versatile Hilt 80 / 80R-1
- Mods – 9 Lethal Mod 80R-2
- Critical – 3,200
- Enhancements – 3 Adept 80R-19
- Augments – 5 Advanced Critical Augments 74
- Crystals – 2 Eviscerating Crystals
- Ear – 1 Sha’tek Adept Device MK-19
- Implants – 2 Sha’tek Adept Package MK-19
- Stim – Advanced Kyrprax Proficient Stim / Advanced Kyrprax Proficient Stim MK-2
- Alacrity – 1,216
- Enhancements – 2 Nimble 80R-19
- Augments – 4 Advanced Alacrity Augments 74
- Accuracy – 1,590
- Enhancements – 1 Initiative 80R-18;1 Initiative 80R-19
- Augments – 5 Advanced Accuracy Augments 74
- Stim – Advanced Kyrprax Proficient Stim / Advanced Kyrprax Proficient Stim MK-2
- Relics – 1 Serendipitous Assault, 1 Focused Retribution
- Adrenal – Advanced Kyrprax Attack Adrenal / Advanced Kyrprax Attack Adrenal MK-2

Level 70 PvE Stats
- Power – 6,851
- Armourings – 8 Versatile Armouring 80 / 80R-1
- Hilt – 1 Versatile Hilt 80 / 80R-1
- Critical – 3,200
- Enhancements – 3 Adept 80R-19
- Augments – 5 Advanced Critical Augments 74
- Crystals – 2 Eviscerating Crystals
- Ear – 1 Sha’tek Adept Device MK-19
- Implants – 2 Sha’tek Adept Package MK-19
- Stim – Advanced Kyrprax Proficient Stim / Advanced Kyrprax Proficient Stim MK-2
- Alacrity – 1,216
- Enhancements – 2 Nimble 80R-19
- Augments – 4 Advanced Alacrity Augments 74
- Accuracy – 1,590
- Enhancements – 1 Initiative 80R-18;1 Initiative 80R-19
- Augments – 5 Advanced Accuracy Augments 74
- Stim – Advanced Kyrprax Proficient Stim / Advanced Kyrprax Proficient Stim MK-2
- Defense – 3,051 / 3,294
- Mod – 9 Warding Mod 80 / 9 Warding Mod 80R-20
- Relics – 1 Devastating Vengeance, 1 Primeval Fatesealer
- Adrenal – Advanced Kyrprax Critical Adrenal / Advanced Kyrprax Critical Adrenal MK-2

Level 75 PvP Stats
- Power – 10,193
- Armourings – 8 Versatile Armouring 80 / 80R-1
- Hilt – 1 Versatile Hilt 80 / 80R-1
- Mods – 9 Lethal Mod 80R-2
- Stim – Advanced Kyrprax Versatile Stim / Advanced Kyrprax Versatile Stim MK-2
- Critical – 3,875
- Enhancements – 5 Adept 80R-19
- Augments – 5 Advanced Critical Augments 74
- Crystals – 2 Eviscerating Crystals
- Ear – 1 Sha’tek Adept Device MK-19
- Implants – 2 Sha’tek Adept Package MK-19
- Alacrity – 1,216
- Enhancements – 2 Nimble 80R-19
- Augments – 4 Advanced Alacrity Augments 74
- Accuracy – 540
- Augments – 5 Advanced Accuracy Augments 74
- Relics – 1 Serendipitous Assault, 1 Focused Retribution

Rotation
Rage Juggernaut rotation is almost ability by ability the same as Fury Marauder. There are some noticeable differences.
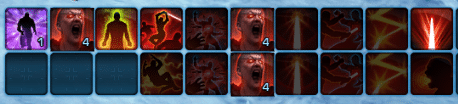
Opener
Opener #1

Vicious Throw -> Furious Power -> Enrage -> Ravage -> Raging Burst -> Furious Power -> Furious Strike -> Retaliation -> Obliterate -> Sundering Assault
Force Crush -> Raging Burst -> Furious Power -> Furious Strike -> Obliterate -> Force Scream
Opener #2
You can leap or throw your saber but wouldn’t recommend wasting any more GCDs in an opener.
Force leap -> Furious Power -> Enrage -> Ravage -> Raging Burst -> Furious Power -> Furious Strike -> Retaliation -> Obliterate -> Sundering Assault
Force Crush -> Raging Burst -> Furious Power -> Furious Strike -> Obliterate -> Force Scream
Core Rotation
Rage spec is a very constant set rotation with no room for error.
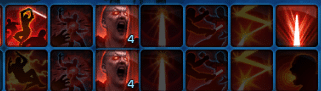
Ravage -> Raging Burst -> Furious Power -> Furious Strike -> Retaliation -> Obliterate -> Sundering Assault
Force Crush -> Raging Burst -> Furious Power -> Furious Strike -> Obliterate -> Force Scream
Rotation Priority
Block A:
 Ravage
 Raging Burst
 Furious Power
 Furious Strike
 Retaliation
 Obliterate
 Sundering Assault
 Raging Burst
 Retaliation
Block B:
 Force Crush
- Raging Burst
- Furious Power
- Furious Strike
- Retaliation
- Obliterate
 Force Scream
 Enrage
Furious Power Priority
- Furious Strike
- Vicious Throw
- Obliterate
- Ravage
- Retaliation
 Vicious Slash
-
 Saber Throw
 - Sundering Assault
AoE Rotation

Ravage -> Smash -> Furious Power -> Furious Strike -> Sweeping Slash -> Obliterate -> Sundering Assault
Force Crush -> Smash -> Furious Power -> Furious Strike -> Sweeping Slash -> Obliterate -> Sundering Assault
Rotation Priority
Block A:
- Ravage
 Smash
Smash- Furious Power
- Furious Strike
 Sweeping Slash
- Obliterate
- Sundering Assault
Block B:
- Force Crush
- Smash
- Furious Power
- Furious Strike
- Sweeping Slash
- Obliterate
- Force Scream
- Enrage
Tips and Tricks
How to Improve
As a Melee DPSer you spend a lot of time on your toes staying out of mechanics that are intended for DPS but also any cleave damage from bosses. Always practice moving and attacking, I call it improving your footwork. I find the best way of getting this practice is doing PvP. PvP combat is always changing to be unpredictable which not only helps you improve attacking on the run but with when and how to use defensive cooldowns, and gives you better awareness of movement. Don’t just do PvP you should also get into any raids, even SM raids to get a base understanding of the working mechanics. If you can always try to do the harder mode mechanics to keep practising them when you go into HM/NiM raids.
When an encounter pull is unsuccessful don’t just run back and think everything is ok. Think about that pull and understand why it was unsuccessful. Ask yourself what you could have done better and what the team could have done better for a kill.
Parsing
I highly recommend using Starparse at any time you’re running content. In PvP, it’s a great way to get a sense of how your DPS is in any given short window. In PvE always have it open to track how your DPS is on each fight even if it’s a pug run. You should always try to get the highest DPS on each boss. In any unsuccessful encounter pull set goals for yourself to get higher DPS than the pull before.
You should always take some time to hit a parse dummy and work on rotations. Take an hour or two every day to parse and set parsing goals for yourself.
Raid Tips
Explosive Conflict
- Zorn and Toth: The red and yellow can be reflected. I would not recommend standing in a purple circle. You can reflect Fearful from Zorn however it’s best to avoid attacking Zorn as a melee unless you need to help DPS Zorn.
- Firebrand and Stormcaller: When on Firebrand you can taunt Incinerate Armour to help your tank out.
- Things you can reflect
- Double Destruction from Stormcaller
- Attacks from adds
- Lightning Pylons that the healer kits
- Things you can reflect
- Colonel Vorgath: You can reflect the boss’ direct attacks if you have aggro and the turrets. If you get the grenade you can Mad Dash it.
- Warlord Kephess: Reflectable Content
- Trandoshan Warriors
- Savage Arcing Slash
Terror from Beyond
- Writhing Horror: Spec into the Consuming Rage utility to self cleanse the Corrosive Slime which drops a yellow circle when cleansed.
- Dread Guards: Heirad’s Force Lightning can be reflected. Ciphas Doom can be Mad Dashed.
- Operator 9:
- Kephess the Undying: Reflectable content
- Focused Laser Blast
- Energy Distortions
- Volatile Emissions
- Terror from Beyond: Reflectable content
- AoE Tentacle Slam during the first phase
- Terror from Beyond Scream
- Hypergate Irregularity
Scum and Villainy
- Dashrode: In all modes when you get lost you can Intimidating Roar the adds and use the Enrage movement speed increase then Mad Dash when the adds catch up to you use the Chilling Scream dot utility to get extra movement speed and gives the adds a slow while dealing some damage to them while you make your way back to the boss.
- Titan 6: In SM and HM when the boss goes up you can Mad Dash into the launch cloud to get to the boss faster and start DPSing again. NOTE: This does NOT work in Nightmare Mode. When you get the bomb in HM and NiM you can Mad Dash when it goes off to take no damage. You can also reflect the adds if you get aggro on them.
- Thrasher: Can reflect Firebugs AoE and Snipers.
- Operations Chief: Reflectable Content
- Gold Squad: Heat Beam
- Operations Chief: Terminate
- Olok the Shadow:
- The Cartel Warlords: Reflectable Content
- Horics direct attacks
- Sunders: The End
- Vilus: Stabbing Spree
- Dread Master Styrak: Reflectable Content
- Kell Dragon: Spines
- Lightning Explosions
- Forcing Lightning
- Thundering Blast
Dread Fortress
- Nefra, Who Bars the Way: You want to take the Endure Pain utility to cleanse the dot every other time. It helps the healers out when you cleanse yourself as much as you can.
- Gate Commander Draxus: When subteroths come out, get them to 50% then Mad Dash out to not get globaled from them. You can cleanse all the dots with the Endure Pain utility. Reflectable Content
- Subteroth Explosion: however Mad Dash is better to use to survive.
- Force Lightning
- Grob’thok, Who Feeds the Forge:
- Corruptor Zero: Reflectable Content
- Chest Laser
- Missile Barrage
- Ranged Adds attacks
- Dread Master Brontes: Reflectable Content
- Orbs
- Droid attacks during the clock phase
Dread Palace
- Dread Master Bestia
- Dread Master Tyrans
- Dread Master Calphayus: Reflectable Content
- Inevitability
- First left Adds Force Lightning
- Dread Master Raptus: Reflectable Content
- Force Execution
- The Dread Masters: You want to use Endure Pain to self cleanse Death Marks. You can reflect Dread Master Bestia’s Force Push
The Ravagers
- Sparky: Brutal Pounce
- Quartermaster Bulo: Reflectable Content
- Scatter Blast
- Mass Barrage
- Ore Carts
- Pirates attacks
- Torque: Reflectable Content
- Turrets
- Fire Device
- Blaster: Reflectable Content
- Rain of Pain
- Coratanni: Reflectable Content
- Deck guns
- Ruugars Dot
Temple of Sacrifice
- Malaphar the Savage: Reflectable Content
- Spear Throw
- Sword Squadron
- The Underlurker
- Revanite Commanders: Reflectable Content
- Kurse’s Smash
- Deron’s Guided Missile Volley
- Revanite Mandalorians direct attacks
- The Returned: Reflectable Content
- Heave
- HK Red Circle
- The middle droid on floor one
Toborro’s Courtyard
- Golden Fury: Reflectable Content
- Purple Circle
- Attacks from adds
Heart of Ruin
- Colossal Monolith: Reflectable Content
- Ground Slam
- Curse
NOTE: The amount of damage reflected back from Saber Reflect has been nerfed since 6.0.
About the Author and Special Thanks
Hi, I’m Andynul, I’m a Family and Friends beta tester for SWTOR since 2009, and have been playing SWTOR ever since. While I’ve been playing for a long time I didn’t start raiding much until near the end of 3.0. I have cleared almost all HM content on almost every class and cleared most of NiM on a Juggernaut. I want to thank Puddlejumper from <Failure>/<Sick Twisted Individuals> for kickstarting me into raiding, also want to thank Yolo from <Zorz>/<Failure> and Kalizo from <Failure> for the helpful advice and tricks to help make me become a better player. I also want to thank those who are in or associated with <The Obsidian Order> with the great time we spent on Revan and the great bagel memes with some hot Russian music.
- Twitch: https://www.twitch.tv/andynulpvp
If you would like to contact me, message me in-game on any Andy toon or toons that start with “Darht” or Discord Andynul#8467.