
Combat Styles is the new reworked class system introduced to Star Wars The Old Republic in Game Update 7.0. I’ve finally put together an in-depth overview and guide of one of my favourite Combat Style (Class), Commando Combat Medic. Here is my SWTOR 7.4 Commando Combat Medic Combat Style Guide.
My 7.4 Mercenary Healing (Bodyguard) Combat Styles (Class) Guide can be found here.
Happy to receive feedback on this guide, especially improvements or corrections. Quality feedback will be compensated!
GUIDE UPDATES
- 17th July 2022
- Expanded the PvE Gear Section to clarify what stat thresholds you should aim for.
- 26th July 2022
- Hyperlink Tooltips now work! Hover over any ability hyperlink with an icon next to it to see the ability’s description.
- 23rd – 24th September 2022
- Fully updated for 7.1! Updated Implants, Tacticals and Gearing and Stats and Builds sections.
- 12th-14th February 2024
- Condensing Sections into Tabs and other formatting changes.
- Updated beginner infographic to GU 7.4.
- Updated gearing sections to GU 7.4.
Table of Contents
- 7.4 Commando Combat Medic Healing for Beginners (PvP Basics)
- Introduction
- Commando Combat Medic Changes (6.0 vs. 7.0)
- 7.4 Commando Combat Medic Combat Style Overview
- Ability Tree Breakdown
- Key Abilities
- Commando Combat Medic Gearing and Stats
- Legendary Implants (Set Bonuses)
- Tacticals
- Stims, Medpacs and Adrenals
- Commando Combat Medic Rotations, Priorities and Buffs
- Commando Combat Medic Builds
- UI Setup
- Essential PvP Tips and Tricks
- My PVP Experience and Special Thanks
7.4 Commando Combat Medic Healing for Beginners (PvP Basics)
Below is an infographic I put together designed for players new to the spec. Hopefully, it will help you get started with this combat style.

If you want to know more details about why I picked specific things or exact details on my gear loadout, read the corresponding sections via the contents menu above.
Introduction
How does one sum up the new Commando Combat Medic Combat Style? Meh. On the one hand, it could have been far worse. On the other hand, there are some bizarre and incredibly frustrating decisions we have to make in our new ability tree (especially PvPers).
In this guide, I discuss the differences between 6.0 vs. 7.0, do a deep dive on the new Ability Tree, talk about the new Legendary Implants (Set Bonus) options as well as Tacticals, cover Gearing and go over the Rotations and Priorities. I’ve also included a Build section that covers the different builds I use for those not interested in the nitty-gritty details. The guide concludes with a PvP Tips and Tricks section.
My goal with this guide is to give a foundational overview of the class and showcase the ins and out’s that will be of benefit to beginners and more experienced players alike.
I’ve definitely written this guide with more of a PvP slant (like my previous Mercenary/Commando Healer Guides). But for the first time, I’ve decided to include some PvE elements too. It’s definitely not my area of expertise though so take it with a grain of salt. I welcome any feedback from more experienced PvE healers!
Commando Combat Medic Changes (6.0 vs. 7.0)
A number of underlying changes have been made to Combat Medic Commando. As you will see below with the new ability tree, the level we are granted certain passives has changed and some passives have been removed completely. We are also losing some abilities or they are becoming optional in the ability tree. Here are some tables that show most of the changes.
Alternatively, you can view the tables for yourself using this link and going to the 'Changes' tab - Link
7.4 Commando Combat Medic Combat Style Overview
Weapons - Assault Cannon
Resource - Energy Cells
Basic Healing Description - Excellent burst capability with decent AOE healing and excellent DoT mitigation.
Base Heal - Med Shot
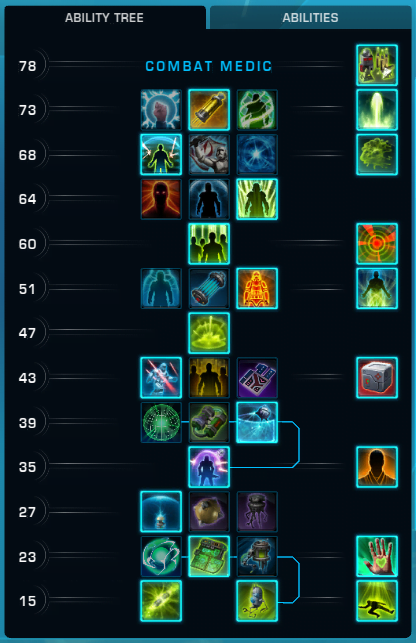
Here is what the new 7.0 Commando Combat Medic Combat Style UI looks like. You can see the ability tree on the right side of the UI.

Here is a detailed overview of the Commando Combat Medic Ability Tree (right-click and open a new tab to see it better).
Alternatively, here's a link to view the Ability Tree Table for yourself - Link
Ability Tree Breakdown
Here is an in-depth breakdown of the Ability Tree with some comparisons to 6.0 and some comments. Click on a Level to see the info! (In some instances uses Mercenary names instead).
 [Ability] Supercharged Cell - Requires and converts 10 stacks of Supercharge to recharge 10 energy cells and increase healing done by 5% for 8 seconds. While active, Advanced Medical Probe has no cooldown and generates 5 less energy cells.
 [Ability] Advanced Medical Probe - Heals a friendly target for x - x.
 [Passive] Residual Globules - Healing a friendly target with Advanced Medical Probe leaves behind a Residual Globule for 10 seconds. A different friendly target can move into the Residual Globule and be healed for x health.
 [Passive] Integrated Probes - Activating Advanced Medical Probe grants Integrated Scanning for the next 15 seconds, increasing all healing you do by 3%.
 [Passive] Critical Probes - Increases the critical chance of Adanced Medical Probe by 5%.
 [Ability] Sticky Grenade - Throws a Sticky Grenade that will detonate after several seconds. Standard and weak enemies enter a state of panic while the grenade is active. The explosion deals x - x kinetic damage to up to 8 nearby enemies when it detonates and slows their movement speed by 60% for 10 seconds. Standard and weak targets are knocked back from the blast.
 [Passive] Charged Barrier - Charged Bolts and Medical Probe generate a Charged Barrier, which increases damage reduction by 2% per stack for 15 seconds. Stacks up to 3 times.
 [Ability] Stealth Scan - Fires off probes that scan the area for stealth opponents for 15 seconds and grants a charge of Battlefield Protocols, increasing the damage or healing dealt by your next non channelled direct damage or healing ability by 20%. For each target revealed from stealth, you generate an additional charge of Battlefield Protocols. This effect stacks up to 5 charges.
 [Ability] Trauma Probe - Deploys a Trauma Probe with 7 charges and lasts up to 3 minutes. When the target is damaged, Trauma Probe loses 1 charge and heals the target for x. This effect cannot occur more than once every 2.5 seconds. A target may not have more than one Trauma Probe active.
 [Passive] Efficient Probes - When Trauma Probe heals its target, there is a 25% chance it does not lose a charge.
 [Passive] Neighbourly Probes - When Trauma Probe heals its target, it also heals up to two additional friendly targets within 5 meters for x.
 [Passive] Trauma Shield - When Trauma Probe heals its target, the target will gain a Trauma Shield, which lasts up to 4 seconds and absorbs up to x damage. This effect cannot occur more than once every 4.5 seconds.
 [Ability] Diversion - Reduces threat towards all current enemies and for 6 seconds after use, it increases melee and ranged defence chance by 35%, provides interrupt immunity and grants 2 charges of Decoy. Each charge of Decoy intercepts and absorbs incoming Force or Tech attack. Each time you absorb a Force or Tech attack in this manner, Decoy loses 1 charge.
 [Ability] Supercharged Celerity - Requires and converts 10 stacks of Supercharge to issue Supercharged Celerity to you and your Operation group members within 40 meters, increasing alacrity by 10%. Lasts 10 seconds.
 [Passive] Overclock - Reduces the cooldown of Concussive Round and Tech Override by 15 seconds each. In addition, Tech Overrride grants a second charge, making your next two abilities with an activation time activate instantly.
 [Ability] Kolto Bomb - Heals up to 8 allies within 8 meters of the targeted area for x - x and leaves a pool of Kolto Pods on the ground, healing allies within for x over 3 seconds.
 [Passive] Cell Capacitor - Recharge Cells now immediately recharges 15 additional cells and grants 10% alacrity for 6 seconds.
 [Passive] Reflexive Shield - When you take damage, the active cooldown of Reactive Shield is reduced by 3 seconds. This effect cannot occur more than once every 1.5 seconds. In addition, when taking damage, you have a 20% chance to emit an Energy Redoubt, which lasts up to 6 seconds and absorbs x damage. This effect cannot occur more than once every 10 seconds.
 [Passive] Tenacious Defence - Reduces the cooldown of Concussion Charge by 5 seconds, Propulsion Round by 3 seconds and Tenacity by 30 seconds.
 [Ability] Successive Treatment - Heals a friendly target for x over the duration, and heals one new friendly target within 20 meters for x with each tick, healing up to four total targets with the final tick. 28 energy cells is generated over the channel duration.
 [Passive] Adrenal Surge - Adrenaline Rush triggers at, and can heal you up to, 60% of your maximum health. Additionally, Adrenaline Rush lasts 2 seconds longer and heals for twice as much each time it restores health..
 [Passive] Combat Shield - Reactive Shield now further decreases ability activation pushback by 30%, increases healing received by 20% and makes you immune to interrupts.
 [Passive] Forced March - Allows Full Auto, Boltstorm and Successive Treatment to be activated while moving.
 [Ability] Hold the Line - Grants 10 seconds of immunity from movement-impairing effects, knockdowns and physics and increases movement speed by 30%.
 [Ability] Echoing Deterrence - Engages a defensive response system that absorbs all incoming direct single target damage for the next 6 seconds, reflecting 50% of the absorbed damage back at the attacker and healing you for 5% of your maximum health each time an attack is absorbed. Can be used while stunned.
 [Ability] Cyro Grenade - Fires an cryo grenade, dealing x - x energy damage and stunning the target for 4 seconds.
 [Passive] Concussive Force - Explosive Round immobilizes the target for 4 seconds. Direct damage caused after 2 seconds ends the effect. This effect can only occur once every 8 seconds. In addition, Concussion Charge's knockback effect is stronger and pushes enemies 4 meters further away.
 [Passive] Parallactic Combat Stims - You recharge 20 energy cells when stunned, immobilized, knocked down or otherwise incapacitated. Additionally, when this happens your next tech ability used within 15 seconds deals 10% more damage or healing.
 [Passive] Trauma Stabilisers - While Reactive Shield is active, you generate a stack of Trauma Stabilizers each time you receive direct damage. Stacks up to 10 times. When Reactive Shield expires, each stack of Trauma Stabilizers instantly heals you for 4% of your maximum health.
Key Abilities
Here are lists of all the key abilities you will use and should have on your Hotbar. Also includes some optional abilities.


Commando Combat Medic Gearing and Stats
In this section of the guide, I go over bolster, gear and stats. if you are unfamiliar with how gearing works, I would encourage you to check out my Game Update 7.0 Gearing Guide (new guide coming soon) and my Game Update 7.1 Level 80 Item Modification Guide.
If you have only recently returned to the game, I would recommend gearing with modifications. It will be much faster.
PvP Gear and Stats
Now you have a couple of options here. Keep using the static/unmoddable Med Tech and/or Mender's gear or use Item Modifications.
It's only really beneficial to upgrade your static gear pieces to Item Rating 336 if you saved up your Weekly Crates prior to 7.4. It's much easier to use two 336 pieces to gain access to the modifications vendor. See my Game Update 7.1 Level 80 Item Modification Guide for details on how to get access to the Item Modification Vendor on your faction's Fleet.
As of Game Update 7.4, PvP bolster is now at Item Rating 336 and Augments still work. However, colour crystals still are not working (shrugs).
Remember Level Sync/Bolster will only start affecting your stats if you go above an overall rating of 336. In other words, it doesn't matter what the Item Rating of individual pieces/mods you have equipped are as long as your overall Item Rating is at 336. As long as your overall Item Rating is at 336, your stats will not get reduced. However, if your overall item Rating goes up to 337, then all your stats will get reduced by the bolster system to 336 Item Rating. This means you miss out on bonus stats.
You can make things easy for yourself and just stick with 336 mods/gear and wear your 340 Legendary Implants.
My general advice would be to not use static gear if you want to be optimised. But if you are happy to stay at just 336 Item Rating and not fuss around with your stats or mods, you can use static gear. Just stick with Med Tech pieces and maybe swap around one gear piece for Mender's depending on the Legendary Implants you use. If you are using two Alacrity Legendary Implants, you will have to swap out one Critical armour piece for an Alacrity armour piece.
Here is the stat distribution for Med-Tech and Mender's (Scoundrel) Gear.
| Med-Tech | Mender's | |
|---|---|---|
| Head | Alacrity | Crit |
| Chest | Alacrity | Crit |
| Gloves | Crit | Alacrity |
| Legs | Crit | Alacrity |
| Boots | Crit | Alacrity |
For non-armour pieces, you want to wear the following:
- Thyrsian Adept Earpiece
- Thyrsian Med-Tech's Blaster Pistol
- Thyrsian Med-Tech's Offhand Blaster
- Thyrsian Relic of Focused Retribution
- Thyrsian Relic of Devastating Vengeance (< 4000 Critical Rating) OR Serendipitous Assault (> 4000 Critical Rating)
If you end up with any Rakata pieces from doing PvE content, wearing them is perfectly fine as stats are near identical to Thyrsian!
I would highly recommend going the moddable gear route so you can adjust your tertiary stats as needed.
BiS Item Rating Set-Up
The optimal Item Rating set-up for PvP currently is as follows.
- 336 Relics
- 340 Implants
- 336 Mainhand and Offhand
- 336 Rakata Earpiece
- All Armour Pieces - 336
BiS Mods
These are the mods you should be using in your gear.
- Versatile Barrel (336)
- Versatile Armouring (336)
- Lethal Mod (336)
- Adept and Nimble Enhancements (336)
You do not need to worry about Mastery or Endurance. It is included by default on all of your Item Modifications. Your focus should be on getting your tertiary stats (Alacrity and Critical Rating) at the right thresholds.
| Stat | Descriptor | Raw Number |
|---|---|---|
| Alacrity | 1.4 GCD | 2,054 |
| Critical Rating | Diminishing Returns* | ~4,000 |

For PvPers, it won't be possible to get to a 1.3 GCD (5431) with current gear levels (remember Guild Perks don't apply in instanced PvP). You need to get to 1.4 (2054) then from there, you can increase your Alacrity until you feel comfortable. I would recommend going 200 over the threshold at the bare minimum but do not go above 2800.
As for Critical Rating, this is where you will put the rest of your stat budget. Around ~4000 diminishing returns supposedly set in. However, it is okay to go higher even up to 5000.
PvE Gear and Stats
You do not need to worry about Mastery or Endurance. It is included by default on all of your Item Modifications. Your focus should be on getting your tertiary stats (Alacrity and Critical Rating) at the right thresholds.
| Stat | Descriptor | Raw Number |
|---|---|---|
| Alacrity (Guild) | 1.3 GCD Guild Perk | 3209 |
| Alacrity | 1.4 GCD No Guild Perk | 2054 |
| Critical Rating | Diminishing Returns | 4000 |

I would recommend running 1.3 GCD if your Guild has the Alacrity Perk. Going a little bit higher is fine, you do not need to be exact. If you play at a higher ping, it is beneficial for you to go 100-200 above the threshold anyway. Put the rest of your tertiary Stat Budget into Critical Rating.
If your Guild does not have the Alacrity Perk (or you are not in a Guild) then at the bare minimum run 1.4 GCD. I would highly recommend, however, going up to around 2200 Alacrity. Put the rest of your tertiary stat Budget into Critical Rating.
PvP and PvE Relics
This applies to both PvP and PvE. Focused Retribution is the first relic you should have. The second relic will depend on your Critical Rating. If you are below 4000 Critical Rating, you should use Devastating Vengeance. If your Critical Rating is above 4000, you should use Serendipitous Assault.
Augments
For both PvP and PvE, you can utilise three tiers of augments depending on your budget. If you can, at least get the Purple Level 75 Augments (that extra Power is too good to pass up). Gold Augments are extremely expensive and are not worth the effort unless you have billions of credits lying around.
Augment 45 - Level 68 [Purple]
- Advanced Critical Augment 45: +96 Critical Rating, +65 Endurance
- Advanced Alacrity Augment 45: +96 Alacrity Rating, +65 Endurance

Augment 74 - Level 75 [Purple]
- Advanced Critical Augment 74: +108 Critical Rating, +144 Power & Endurance
- Advanced Alacrity Augment 74: +108 Alacrity, +144 Power & Endurance

Augment 77 - Level 75 [Gold]
- Superior Critical Augment 77: +130 Critical Rating, +171 Power, +171 Endurance
- Superior Alacrity Augment 77: +130 Alacrity, +171 Power, +171 Endurance

The following Crew Skills can craft Augments.
- Armourmech - Alacrity Augment 74 & 77
- Synthweaving - Critical Augment 45, 74, 77 & Alacrity Augment 45
Legendary Implants (Set Bonuses)
Set Bonuses have been moved to Implants in 7.0 and are now called Legendary implants. You can read more about how to obtain the new Legendary Implants in my Legendary Implants Guide.
Here is a list of all the relevant Combat Medic Legendary Implants. You will be able to have two different set bonuses equipped at a time. You can not stack two identical Legendary Implants.
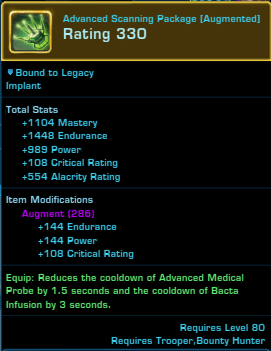
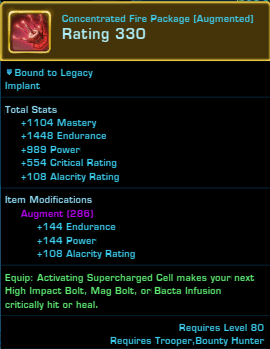
| Name | Tertiary Stat | Description |
|---|---|---|
| Advanced Scanning | Alacrity | Reduces the cooldown of Healing Scan by 1.5 seconds and the cooldown of Emergency Scan by 3 seconds. |
| Concentrated Fire | Critical | Activating Supercharged Gas makes your next Rail Shot, Mag Shot, or Emergency Scan critically hit or heal. |
| Random Charge | Alacrity | Damaging an enemy or healing an ally has a 10% chance to generate a stack of Supercharged. Cannot occur more than once every 5 seconds. |

Details and Comments:
Advanced Scanning Package - in my opinion, is the best of the three Set Bonus options we have. Reducing the cooldown of Bacta Infusion is a no-brainer as far as I'm concerned especially with the limited mobility we have now. The Bacta Infusion -> Advanced Medical Probe combo every ~15 seconds (depending on alacrity) is one of the few opportunities we now have to do significant healing on the move. Obviously reducing the cooldown of Advanced Medical Probe is useless (since it's never cast only proc'ed by Bacta Infusion) but I still think this legendary is worth it just for the 3-second cooldown reduction of Bacta Infusion.
Concentrated Fire - is also a good option. Supercharge guaranteeing a crit on Bacta Infusion especially paired with Advanced Scanning makes it a decent choice. How it works is as soon as you activate Supercharge Cell, you get a Concentrated Fire buff that lasts for 20 seconds. This means you have 20 seconds to use Bacta Infusion to get it to crit, which is plenty of time. You are better off using it while Supercharge is active though to take advantage of the 5% heal increase from Supercharge.

Random Charge Package - A 10% chance to build a stack of Supercharge every heal or damage ability, with a 5-second cooldown, is pretty lame. Consider how many times you could potentially build a stack in a 15-second window. Is it really worth it when you could instead reduce the cooldown of Bacta Infusion to ~15 seconds? Building supercharge is pretty easy as is (especially with the SC-4 Treatment Scanner Tactical).
Regardless of whether you PvP or PvE, you're going to want to use Concentrated Fire. As for picking your second Legendary, I think it comes down to personal preference. However, I believe reducing the cooldown of Bacta Infusion (Advanced Scanning Package) is the better option.
Tacticals
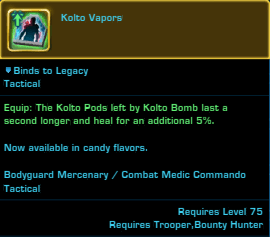
Tacticals have not changed from 6.0. However, Rocket Fuel Vapours was removed at the start of 7.0 and then put back in the game in 7.1 but renamed to Kolto Vapours.
Here is a list of all the relevant Tacticals for Commando Combat Medic in 7.0. All Tacticals can be purchased from Sabacc Sav on the Supplies section of Republic Fleet for 3,000 Tech Fragments and 1 Million Credits.
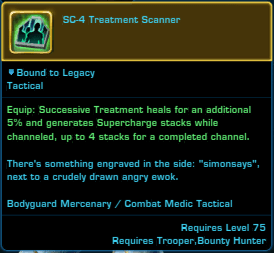
| Name | Description |
|---|---|
| SC-4 Treatment Scanner | Progressive Scan heals for an additional 5% and generates Supercharge tacks while channelled, up to 4 stacks for a completed channel. |
| Kolto Vapors | The Kolto Pods left by Kolto Missile last a second longer and heal for an additional 5%. |
| Running Rapid Restoration | Healing Scan can be cast while moving and heals for an additional 15%. |

More Info and Comments:
SC-4 Treatment Scanner is the best choice. Being able to build 4 stacks of Supercharge every ~13 seconds (assuming the cast is not interrupted) is very useful. It is consistently useful across all content.
Kolto Vapours is a situational option. Kolto Pods last for 3 seconds by default which is pretty decent already considering the Kolto Missile cooldown is ~5.5 seconds. With this Tactical, you're adding an extra second of Kolto Pods which equals one extra tick of healing. Kolto Pods ticks are around ~1600-3600 each.
Is it worth missing out on Supercharge stacks from Successive Treatment for a small extra tick of healing on Kolto Pods? It really comes down to how often you can effectively use Kolto Bomb. Are four or more people constantly grouped together in a particular encounter? To summarise, it may be situationally useful but for the majority of content, you're better off with SC-4 Treatment Scanner.
Running Rapid Restoration is completely useless. The only time you should be using Advanced Medical Probe is when it's proc'ed to instantly cast by Bacta Infusion. So don't even bother buying this Tactical.
Stims, Medpacs and Adrenals
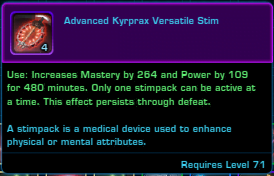
In PvP and PvE, you want to be using the Versatile Stim.
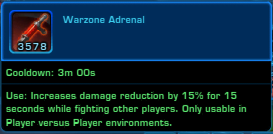
For PvP, you want to be using the Warzone Medpacs and Adrenals. You get these as a drop from your match completion crates. The Medpac does not restore a fixed amount of health. Instead, it restores 35% of your maximum health. The adrenal increases your Damage Reduction by 15% for 15 seconds. So use it as another defensive cooldown.

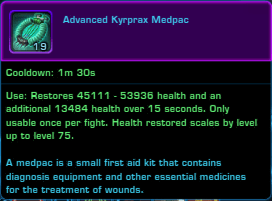
For PvE, the Advanced Kyrprax Medpac and Advanced Kyrprax Adrenals are the highest level available. You can craft them on Biochem and if your raid toon is Biochem, you can craft reusable versions to use instead. Only characters with the Biochem Crew Skill can use reusable Stims.

Commando Combat Medic Rotations, Priorities and Buffs
Here are all the various rotations and priorities and important buffs. But first let's discuss our resource, Heat.
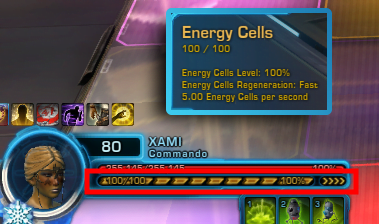
- Energy Cells (Resource)
- Rotations and Priorities
- Rotation Key Info
- Downtime
- Defensive/Utility Use
- Buffs
- Cleansing
Commando Healers have Energy Cells as their resource. Using an ability costs Energy Cells. The more abilities you use that cost Energy Cells, the lower your Energy Cells get. Some abilities cost more Energy Cells than others. Med Shot is our base Heal does not cost any Energy Cells and should be weaved in (used) regularly between your other Abilities that cost Energy Cells.
Commando Healers have a loose rotation centred around the Bacta Infusion -> Advanced Medical Probe combo, using Successive Treatment off cooldown and the efficient use of Supercharge.
Encounter and Match Prep
Before any match or boss encounter begins you should do the following:
- Build 10 Stacks of Supercharge (use Med Shot on yourself or a friendly player).
- Put Trauma Probe on everyone.
Priorities/Rotation
When a match or encounter starts, just use your fillers and/or do some DPS.
Minimal Damage: Med Shot -> Kolto Bomb
As soon as you and your teammates start taking chunks of damage, pop Supercharge then use Bacta Infusion -> Advanced Medical Probe -> Successive Treament (ideally on yourself).
Burst: Supercharge -> Bacta Infusion -> Advanced Medical Probe - > Succesive Treatment
You can also throw in a Kolto Bomb during Supercharge if your teammates are stacked up and all taking damage. While waiting for Bacta Infusion -> Advanced Medical Probe to come off cooldown, use your fillers: Med Shot and Medical Probe and/or drop a Kolto Bomb (if your teammates are decently grouped up). Then refresh Trauma Probes on yourself, priority teammates and clumped up teammates as needed.
Fillers: Med Shot -> Medical Probe - > Kolto Bomb
If there is only a steady amount of damage going out on multiple players use Kolto Bomb, refresh Trauma Probe then top up with Medical Probe as needed while weaving in Med Shot.
Key things to consider:
- Try to use Bacta Infusion -> Advanced Medical Probe off cooldown. You want to do this for a couple of reasons. To take advantage of Advanced Scanning (Legendary implant) cooldown reduction of Bacta Infusion (if you're using it) and to keep Integrated Probes up (Ability Tree Passive). Integrated Scanning lasts for 15 seconds.
- Activating Supercharge Cell makes your Bacta Infusion critically heal (if you're using Concentrated Fire Legendary implant). So you should try to use Bacta Infusion AFTER activating Supercharge. The buff that this Legendary applies when you use Supercharge Cell is available to you for 20 seconds. While it is better to use Bacta Infusion -> Advanced Medical Probe with Supercharge active to take advantage of the 5% healing increase, the Concentrated Fire buff lasts beyond that 6-second duration of Supercharge. In the event you muck up your rotation, you will still be able to utilise the buff just not as effectively since you are missing out on the 5% healing increase from Supercharge.
- Watch who you target with Successive Treatment. The additional ticks of healing spread out to allies around the initial target of the heal. To use it efficiently, place it on an ally with friendlies close to them or yourself if you're next to your teammates. Alternatively, it works well as a burst heal for yourself or a tank if required. Use it off cooldown ideally towards the end of Supercharge.
- Use Med Shot (1 charge) and Medical Probe (2 charges) to build up 10 charges of Supercharge Cell then activate it. Try to use it off cooldown. You should build up 10 stacks fairly quickly and regularly by using Med Shot frequently as a filler. If you're using the SC-4 Treatment Scanner Tactical this will make Successive Treatment build up to 4 stacks of supercharge.
- Medical Probe builds up stacks of Critical Efficiency which reduces the cost of your next Advanced Medical Probe per stack (stacks up to 3 times). Having 3 stacks of Critical Efficiency will make your next Advanced Medical Probe free. Medical Probe if you're specced into Charged Barrier (Ability Tree Passive) also gives you 2% Damage Reduction per charge. You can have up to three charges (6% DR).
- Trauma Probe can be refreshed on priority targets or stacked players as your energy cell management allows. Always refresh Probes on everyone during downtimes including when there aren't many enemies around or not much damage is going out.
- Kolto Bomb is not only an AoE heal but also acts as an AoE Slow reducing the movement speed of up to 8 enemies hit by 50% for 3 seconds. This is particularly useful in Huttball.
- Weave in Med Shot to build up your supercharge and to help manage your heat! It is your base heal and does not cost any Heat.
The key to healing well is to be able to quickly switch targets and be able to predict who is going to take the most damage. Use your filler abilities when there isn’t much damage going out.
- PvP - When minimal damage is going out, refresh Trauma Probe and help your teammates finish off low-health targets. Top up everyone's health.
- PvE - When minimal damage is going out, refresh Trauma Probe on the Tanks, your co-healer and yourself then the DPS. Keep everyone topped up with Med Shot and Kolto Bomb.
- Off-DPS Priorities: Hammer Shot -> Electro Net -> High Impact Bolt -> Full Auto -> Charged Bolts (builds 1 stack of Supercharge) Plasma Grenade (high Energy Cells only).
In this section, I'm going to talk about how and when you utilise each of your abilities including positioning.
- Echoing Deterrence - use when taking a lot of incoming damage especially burst damage from multiple sources. Keep in mind that you can use it while stunned.
- Reactive Shield - use when taking a steady amount of damage. If you are specced into Trauma Stabilisers (Ability Tree Passive) use it when you are getting hit by a few enemies so you can build your 10 stacks up quickly. You can click off the stacks (you can see them on your buff bar) to apply the heal immediately if you're low on health.
- Adrenaline Rush - use when taking a decent amount of damage. You can precast it before going into fights and it will trigger automatically once you go below 35% (or 60% if you take the Kolto Surge passive).
- Diversion - use when getting hit by a couple of enemies to absorb some damage and in more heated fights to give yourself 6 seconds of interrupt immunity. Keep in mind that players can still stun you.
- Electro Net - ideally used on enemy team healers, enemy ball carriers in Huttball or on pesky melee DPS who won't leave you alone.
- Concussion Charge - use to give yourself or a (ranged) teammate some breathing room. If knocking melee with leaps away use your knockback near a LoS (line of sight) point so they can't leap back to you straight away to get them off your tail for a few extra seconds. For example, if you're near a pillar use the knockback while standing near the corner of it, then go around the corner to prevent melee from leaping to you.
- Tech Override - Use to give yourself an instant cast (no channel) on Medical Probe. Also, gives you 6 seconds of interrupt immunity. Again, players can still stun you. Note it does not work with channelled abilities (damage/heal ticks multiple times throughout cast) eg. Successive Treatment, Full Auto.
- Recharge Cells - use to increase your Energy Cells in the event you get low on Energy Cells and really need to be able to keep healing. Also makes the next ability you use cost no Energy Cells.
Here is an overview of some of the key buffs that you can apply to yourself and other players. These tooltips help inform when and who to use your abilities on.
Buffs you can apply to yourself and other players
- Successive Treatment
- Preventative Medicine (Passive) - heals the primary target of Successive Treatment for an additional x over 9 seconds.
- Protected - increases armour of all targets hit by Successive Treatment by 10% for 45 seconds (Preventative Medicine Passive).
- Advanced Medical Probe
- Invigorated - increases healing received by 3% for 45 seconds (Kolto Residue Passive).
- Bacta Infusion
- Emergency Response - makes the next Advanced Medical Probe activate instantly.
Buffs you can apply to yourself
- Med Shot
- Regenerates 1 Energy Cell when it normally heals and 2 Energy Cells when it critically heals (Med Boosters Passive).
Cleansing is an important part of being a competent PvP healer. In instanced PvP environments, only effects that impede or hinder players (such as CC's, Slows, Snares etc.) can be cleansed. Dots that do damage can not be cleansed. Commando Combat Medic Healers can cleanse Tech, Physical and Mental Effects.
The Commando Cleansing ability is: Field Aid
Here are some examples of some of the effects we can cleanse. The Icon pictured is how the debuff will look on the Operations Frame.
CC's
| Class | CC's | Icon |
|---|---|---|
| Imperial Agent / Smuggler | Flashbang / Flash Grenade | |
| Operative / Scoundrel | Sleep Dart / Tranquilizer | |
| Juggernaut / Guardian | Intimidating Roar / Awe | |
| Mercenary / Commando | Concussion Missile / Charge |
Abilities
| Class | Ability | Type | Icon |
|---|---|---|---|
| Juggernaut / Guardian | Chilling Scream / Freezing Force | Mental | |
| Operative / Scoundrel | Sever Tendon / Tendon Blast | Tech | |
| Sniper / Gunslinger | Leg Shot | Tech |
Commando Combat Medic Builds
In this section, I cover a couple of different builds I'm currently running.
This is my current PvP build. This build is defensive-heavy with some interrupt immunity and has little mobility.
GEAR
- Crit pieces/Enhancement - Mainhand, Earpiece, Head, Boots, Gloves, Legs, Implant (Implant 340, everything else 336)
- Alacrity pieces/Enhancement - Offhand, Chest, Implant (Implant 340, everything else 336)
- Belt & Bracers - 336
- Relics - Focused Retribution and Serendipitous Assault (336)
- Earpiece - Thyrsian Adept Earpiece (336)
- Legendary Implants - Advanced Scanning, Concentrated Fire (340)
- Tactical - SC-4 Treatment Scanner
- Augments - Crit: 9 Alacrity: 5 (286 purple)
- Colour Crystals - Eviscerating (Crit)
- Stim - Advanced Kyrprax Versatile Stim
ABILITY TREE FLEX SPOTS
- Level 39 - This is definitely one of those rows that comes down to personal preference. There isn't a wrong choice here. Personally, I like Neighbourly Probes as most of the time my teammates are bunched up within 5 meters of each other anyway in unranked. So the cross healing from Neighbourly Probes can add up quite a bit!
- Level 73 - If you want that extra oomph in defensive capability, then you can absolutely take Trauma Stabilisers instead of Paralletic Combat Stims. However, I personally find that given how prevalent immobilising and incapacitating effects are at the moment, it certainly doesn't hurt to give yourself that extra help when it comes to heat management. Note, there is no cooldown on it.
NOTES
The Integrated Probes (23) passive pairs well with the Advanced Scanning Legendary Implant effectively enabling you to almost always have a 3% buff to all the healing you do. If you then add in the Concentrated Fire Legendary Implant, you get yourself a potent burst heal combo if you use Bacta Infusion after activating Supercharge.
Each cast of Medical Probe builds a stack of Charged Barrier (27) which increases your damage reduction by 2% per stack and lasts for 15 seconds. So taking Charged Barrier effectively can give you constant Damage Reduction. It stacks up to 3 times so if you have 3 stacks of Power Barrier, you have 3% DR.
You can definitely build to be more mobile for PvE. For most encounters, the base defensives (without ability tree buffs) will suffice. Basically, I threw this build together for the rare occasions where I do PvE content. There are a couple of flex options depending on the encounter.

GEAR
Gear will come down to whether you have access to 344 gear or not. Note Rakata Gear can be upgraded to 344. I am personally using a mix of 340 Item Modifications and Rakata Gear.
- Veratile Armouring 105 x7, Versatile Barrel 105 x2, Lethal Mod 105 x9 (340)
- Adept Enhancement 101 (Crit)- Mainhand, Boots, Gloves, Legs (340)
- Nimble Enhancement 101 (Alacrity)- Offhand, Head, Chest (340)
- Relics - Rakata Focused Retribution and Rakata Devastating Vengeance (344)
- Earpiece - Rakata Adept Earpiece (344)
- Legendary Implants - Advanced Scanning (Alacrity), Concentrated Fire (Crit) (340)
- Augments - Crit: 4 Alacrity: 10 (286 purple)
- Colour Crystals - Eviscerating (Crit)
- Stim - Advanced Kyrprax Versatile Stim
ABILITY TREE NOTES
Depending on the encounter there are a couple of rows you will want to change.
- Level 39 - If you don't want to fuss around with your ability tree, then Efficient Probes is a good option to take. Depending on the encounter though, you can tailor which passive you take. For encounters where your group is going to be spread out, you can use Trauma Shield and for encounters where your group is going to be mostly stacked, you can use Neighbourly Probes.
- Level 43 - you may want to take the raid buff instead. But that will depend on your group.
- Level 68 - you can swap out Echoing Deterrence for Hold the Line as needed.
UI Setup
This is how I currently have my UI set up for PvP. I use a Logitech G600 Mouse so having the bars set up vertically, three across, matches perfectly with the side buttons of the G600.

Here is a link to my UI if you wish to download it for yourself (via Dropbox) - Xam Xam 01
Essential PvP Tips and Tricks
In this section of the guide, I go over some essential SWTOR PvP tips and tricks. They will help you better understand how to heal in PvP and how to be a better PvPer.
This is an absolutely critical skill that you should work on if you truly want to master PvP.
What is Situational Awareness? Basically, it is the ability to be aware of your surroundings (what is happening around you) while simultaneously being able to perform your designated role within the ruleset of whatever environment you’re in.
In PvP in SWTOR, this means simultaneously:
- Being aware of the current circumstance of the Warzone. Is your team winning or losing? How many points does your team have?
- Constantly being aware of where your teammates are and where the enemy team is. Essentially, you should be asking yourself: Do I need to be here? Should I be elsewhere? Where is my team? How are they doing? AKA the numbers game.
- Being aware of your own situation. If you’re taking a lot of damage, pop a defensive cooldown or LOS the damage. Melee DPS in particular need to be mindful of if they’ve strayed too far from their team. A good melee DPS will go back to their teammates for healing when their health starts to drop real low. Healers generally will not chase after melee DPS who stray too far away and don’t have the smarts to come back into range of healing.
To further expand on the second point, here are a few strategies you can use to help you be more situationally aware.
- If you are not defending, at the very least, note who is. That way, if you see their health drop, you know they’re under attack! Yes, the person defending should call out but most of the time this does not happen or they call too slow or too late. Being aware of who is defending and being able to get to them to help them quickly could mean the difference between winning and losing a match. One way to help you keep a better eye on who is defending the node is to have them on ‘Focus Target’. That way, you can see if they’re get sapped as well as more easily monitor their health.
- You should be vaguely aware of how many teammates are with you and how many enemies there are. For example, if you’re in a Civil War or Yavin Ruins and there are 6 of you verses 4 of the enemy team at a control point, then you should be asking yourself, where is the rest of the enemy team? Am I needed elsewhere? Depending on the enemy teams composition, you're almost certainly needed elsewhere.
If you can master situational awareness then you will excel at PvP. It does take time to master as it does take time to learn all about the various things you need to be aware of simultaneously.
- Positioning – Make sure you position yourself towards the back of the pack. Stand near something like a pillar that you can use to ‘line of sight’ incoming damage. Use the environment to your advantage.
- Kite – Learn to move around while healing (yes you can do that) regularly even if it is not necessary so that when you do have to run away or run around pillars (eg. Civil War Mid & Voidstar) you can keep healing.
- Find a Pocket Tank – If you can find one (good luck finding one who knows what they’re doing) you won’t know yourself! Trust me, it makes a difference to your survivability having a tank around to taunt incoming damage, peel, stun and annoy anyone trying to kill you.
- Learn to not use your CC Breaker – you’ll find yourself white barred and stun locked pretty frequently. So save your CC breaker for only dire circumstances and only use it when you’re white barred except in exceptional circumstances.
- Smart Healing – Accept that you’re not going to be able to keep everyone alive. This is the reality of healing. Don’t waste your time chasing after someone who is LOSing you or chasing a melee that is too far away from the node. Know your limitations. If someone is close to death don’t waste your resources trying to get them back up unless you know you can do it without compromising you Heat or if it’s crucial for keeping the objective. This is where playing other classes comes in handy as it helps you learnwhat other classes are capable of in terms of damage output which will inturn help you learn what you can heal through.
- Node Guarding – Yes, this will likely happen on the odd occasion (but really, you shouldn’t be guarding unless there are 2-3+ other healers on your team). All you need to do is stand around 30 meters away from the objective and out of sight if possible. That way, it makes it harder for stealther’s to sap cap you. Remember to call out as soon as you see someone coming. While you wait for reinforcements run around, LOS and stay alive for as long as possible while you wait for reinforcements.
Resolve is a system that mitigates the effect of impairing/crowd control abilities on a player. Even as a healer you need to understand how resolve works, how it will affect you and how your stun, CC (crowd control/mezz) and knockback (all CC effects) will affect resolve. When you stun, CC or use a knockback your opponent will fill up their white bar incrementally. Once their bar is full they are immune to stuns, CC’s and knockbacks for a short duration until their white bar gets reset to zero. The resolve bar appears under the character name.


If you have a full resolve bar most of the time, this generally gives you an advantage. However good players can use the resolve system against you. If they know how much resolve an ability builds, they can time their abilities out to prevent you from getting white-barred. Or they can deliberately white-bar you (when they know you’ve used your CC breaker already) and potentially cap an objective.
The Resolve Bar is divided into 4 sections which each have 4 parts totalling 16 parts.
Here is a table that shows how much Resolve Stuns, CC’s and knockbacks build.
| Ability Type | Resolve Bar | Resolve |
|---|---|---|
| Crowd Control | 13/16 | |
| AoE Crowd Control | 10/16 | |
| Stun | 13/16 | |
| Knockback | 3/16 |
The rate at which resolve diminishes is 1/16 per 2 seconds.
The most important tip of all! Being able to predict who is going to take damage, how much damage they're going to take and judging the rate they're taking damage takes time and practice. Knowing which heals to use and who gets healing priority also takes time and practice.
PvP a lot. Don’t get discouraged by yourself or anyone else. Have patience with yourself. Keep at it and you will get better!
My PVP Experience and Special Thanks
Thank you for reading this guide! Let me know your thoughts in the comments below or on Social Media. And a special thank you to my Patrons and Twitch Subscribers for your continued support!
Thanks and PvP Experience
Special Thanks
Thank you to Andynul for teaching me the HTML coding used in this guide. Thank you to the folks in the Theorycrafters Discord who do all the math and testing to figure out all the things. And thank you Cease for your insights on gearing and stats for PvP.
My PvP Experience
I have a Warlord Commando (99) and an Elite Warlord Mercenary (100). I’ve been playing Mercenary/Commando heals at max level since 1.x days. I have experience PvPing on almost every Combat Style/Class and Discipline. Some more than others. I’ve levelled most of my alts through PvP (or predominantly PVP). Other classes, I have experience with include Carnage Marauder, Sage/Sorc DPS & Heals, Scoundrel/Operative Heals and Powertech DPS. I do not claim to be the best PvPer, PvP is a game mode I really enjoy and I’m always looking to improve and be a better PvPer.

Thanks for the guide! Is there any way to see a sample log, e. g. against the healing dummy on parsely?
I’d like to see an ideal freecasting “rotation” for reference and personal improvement, rather than a real fight log.
you have this guide titled 7.1 but the gear ratings are way lower for that patch. Is this updated? I love the info here but unsure if it is current
No it’s not up to date. I’ll be going through and updating all the healing guides soon.