Written and compiled by Herc and <Process>, Edited by Xam Xam.
Overview
A Guide to the Apex Vanguard encounter in The Nature of Progress (Dxun) Operation.
- Boss Health: 47,048,860 (8 Man)
- Ideal Comp: 2 Assassin Tanks 4 DPS (1 Marauder for predation, 3 with self cleanse) 1 operative healer and 1 Mercenary or Sorcerer healer
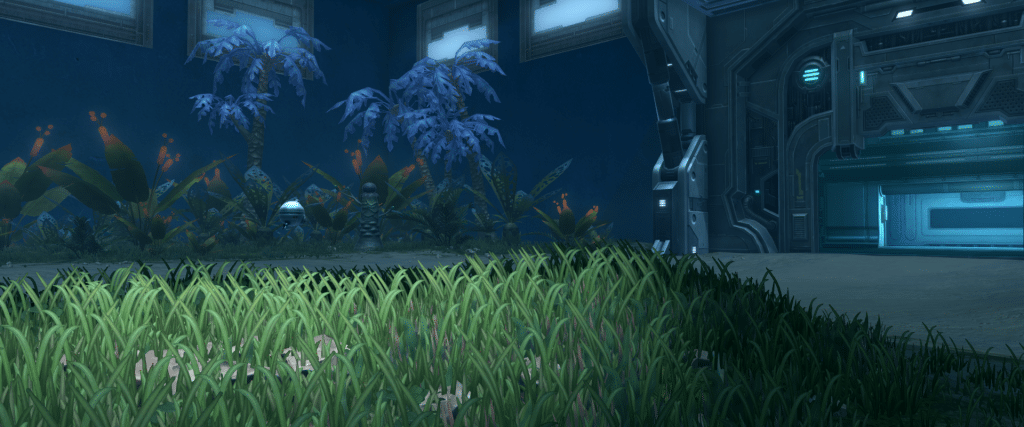
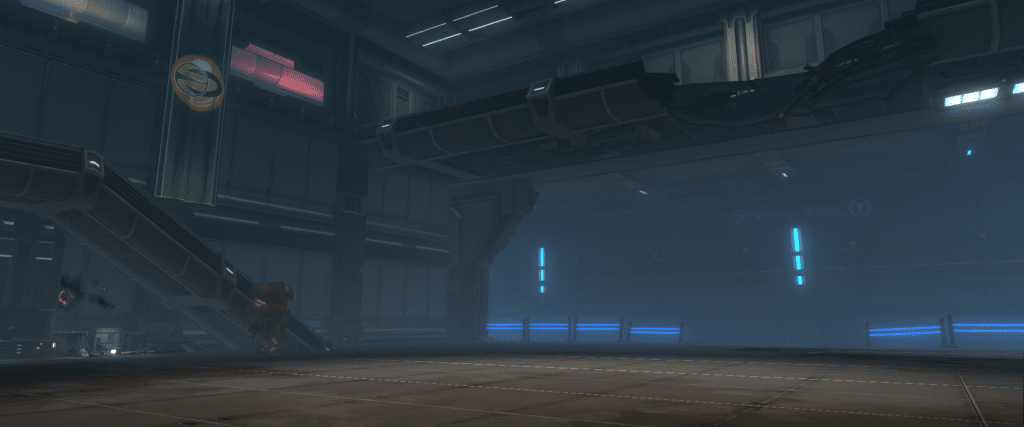
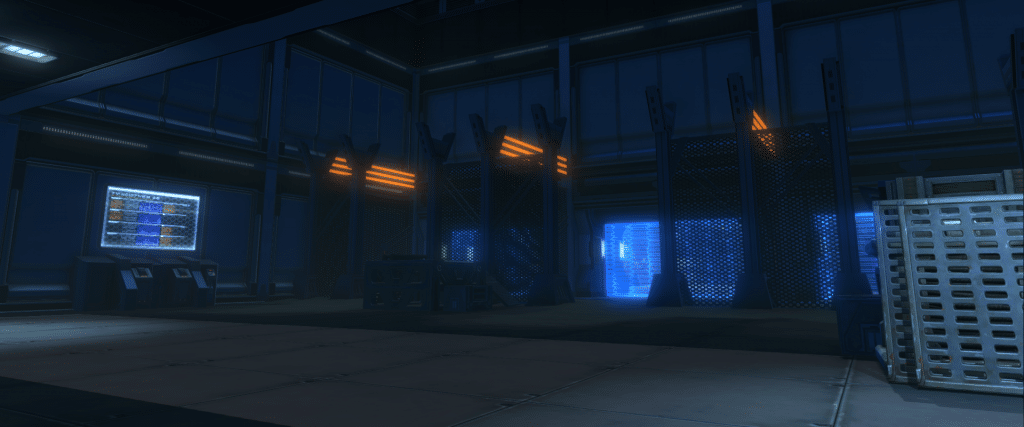
Room
For Tanks and healers, memorizing the layout of this room is very important. Tanks do most of the mechanics of the fight and one mistake at the wrong time can cause a wipe.
Boss Mechanics
Acid Blast: 1 second Cast that drops a massive green goo puddle on the ground where the person with the highest threat is standing.
Contagion: A raid-wide debuff that occurs every minute and needs to be cleansed ASAP, when cleansed it drops a green circle on the ground. If you do not have contagion and you step into a green circle or go inside someone else’s contagion, it spreads and reapplies the debuff. In SM, it can be cleansed where ever you’re standing and doesn’t spread in any way.
Acid Deluge (HM only): At 30% he channels acid deluge, which gives him 4 rapid-fire acid blasts. (he has a buff which tells you how many acid blasts he has left).
Zone Defence: Boss has two cannons on his shoulders. These are yellow and purple. When he casts zone defence you get a purple or yellow debuff on you based on your position in relation to the bosses arms. Whichever debuff you get you need to move to the opposite colour cannon on Apex. You can pre-plan zone defence with good tanking.
Rocket Salvo: Unavoidable rockets that happen frequently and do more damage if people are stacked

Darkness Stacks: The boss gains these stacks and does more damage if not in a flare or in the light.
Last Ditch Effort: Auto Enrage at 5%. If the bosses target dies or gets outranged he will leap and do massive AOE to the group.
Peak Performance: Enrage mechanic with the boss. He has a stacking buff at 99 and drops 5 stacks each time it goes down. You want to keep the boss percentage lower than the peak performance stacks. If he has lower peak performance stacks than health he enrages.

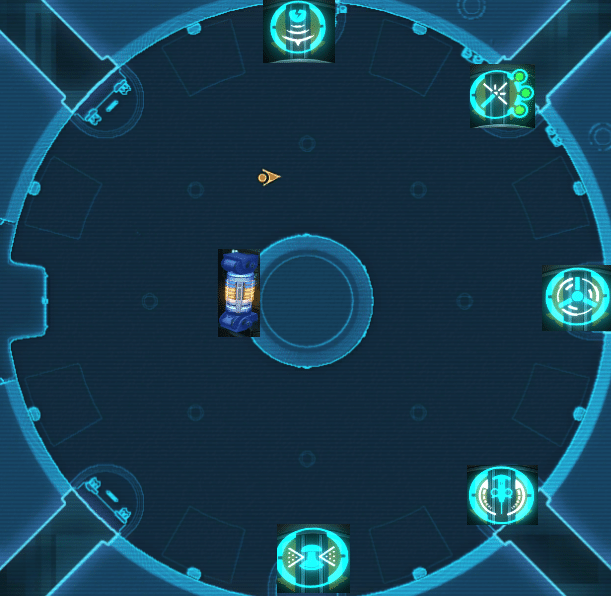
Battery Mechanics

Red Venom Cloud: 3-second cast that applies a stacking DOT that does more damage, up to 25 stacks. To negate this mechanic you click the Fan which consumes 2 battery charges


Wash: Clicking on this terminal will wash and cleanse all acid pools as well as contagion pools. Consumes 2 battery charges.

Mass Target Lock: 2-second cast that applies a debuff on all players. After 30 seconds the boss will cast Bombardment which will effectively wipe the raid unless you click on the Pulse Disruptor panel. Consumes all battery charge.


Stims: These are used to increase your accuracy and damage when the boss casts Blinding Spray which removes your accuracy. Requires a battery charge but consumes none.

Flares: These are made at the and prevent the boss from gaining darkness stacks. Green Dots mean a flare is ready to be picked up. Red dots mean there are no flares in. Brown dots mean flares are being made. Each flare produced uses 2 battery charges and takes 45 seconds to be made.
HM Strategy
This strategy is based around 2 tanking the fight. We understand that it can be solo tanked but feel its a waste of tank defensives to do so.
Pre-fight: Memorize the layout of the room and decide who is tanking the boss first and who is doing the battery. Designate a healer to do flares.
100%-93% (Non-Battery Phase)
Our strategy is built around tanking the boss on the left side of the room where there are no consoles to click. The tank who is picking up the battery will pull the boss to the edge of the room and pop DCDs to reduce damage from the bosses enrage. Tank swap after defensives run out. Do your best to stack acid blasts as it will reduce the number of washes needed throughout the fight. You will get one contagion before you push phases. To deal with this have your ranged stay spread out. Once the cast for contagion goes out, have them stack and cleanse as soon as the debuff is applied. Melee can either stack with the tank for contagion or drop it inside an acid blast pool.
Once the boss hits 93% he will start casting Photogenesis. Once the cast finishes he will start regenerating health in the light. Have all DPS switch to the battery in the centre of the room. Once the battery shield is destroyed then phase 2 begins.
WHEN the boss is pulled have your flare healer go and pick them up from the console.
93-5% (Battery Phase)
Battery Person (Tank)
Immediately pop a speed boost, pick up the battery and go make flares. Make all 3 and go back and recharge the battery and then make stims. Communicate when 12 stims are made so the 2 DPS doing the first Voltinator can pick them up. (We have the second set of DPS pick them up when the first Voltinator cast is going off). Right after the stims are made a Venom Cloud will go out. Go use the fan and then go wash. Once you wash then put the battery in the charger and Tank swap. The fight gets semi-random after this so pay attention to which mechanics are being cast.
The battery slows you with a debuff. When the debuff gets to 20ish stacks then call for a tank swap.
Tips: Call for predation when you need it. Always pop a speed cooldown right before picking up a battery. Priority for battery usage is Target Lock>Flares>Venom>Wash>Stims. Make sure you always have flares being made and communicate with the healer when they are ready to be picked up. Try not to get behind on anything.
Boss Tank

Continue to tank the boss on the left side of the room, stacking acid blasts and slowly moving to the side that has no acid blasts. Once a wash happens then take the boss to the other side. Place contagions in an area you won’t need to run through.
Have the boss faced away from the group but at an angle so you can execute zone defence. Once the boss casts zone defence you just immediately turn him the other way and nobody should take damage from zone defence. (Zone Defense Video Posted Above)
When the boss casts acid deluge, tank the boss in one spot and drop all acid blasts there. Pop a major defensive cooldown. If this lines up with zone defence or another mechanics then have the raid pop personal defensive cooldowns. (Acid Deluge Video Posted Above)
DPS
- Raid buff as soon as the battery shield is destroyed and darkness overdrive is being cast. Raid buff on cooldown.
- Don’t screw up contagion. Stack when it is cast and then get back out and spread.
- Split the DPS into 2 groups for blinding spray. The first group will go get 4 stims each when the tank calls for it. The second group will get stims when the first cast of Voltinator goes out since they cannot damage the boss.
Tips: A few DPS like Marauders and Powertechs can increase their DPS by standing in acid blast pools. Stay spread to minimize damage from rocket salvo.
Healers
The flare healer needs to drop flares that lead tanks out of acid blast pools. Try and clip the boss to maximise the area the tank can use.
At times a tank will stand in acid blast pools for either zone defence or deluge. Make sure they are getting healed. If the battery carrier gets behind on mechanics then it’s possible that the raid will take a lot of damage from Red Venom Cloud.
5% (Auto Enrage)
Once the boss casts Last Ditch Effort, the tank with the battery will drop it and pick up the boss and pop a major defensive cooldown. Keep cycling through defensives and if you run out call for a tank swap. This is a rather easy phase if you manage to keep the bosses darkness stacks low.
Videos
About
Hi, I’m Herc and am a GM of <Process>. We decided as a guild at the beginning of this tier to write guides for Dxun to help guilds out. <Process> is a guild merger of <Elitist> and <Provectus> and we are located on Satele Shan. We hope these guides help you progress through Dxun. Thanks!